When a user creates a Non-Workflow application, the following components are available in the APM:
| Non-Workflow Components | Thumbnail |
|---|---|
| 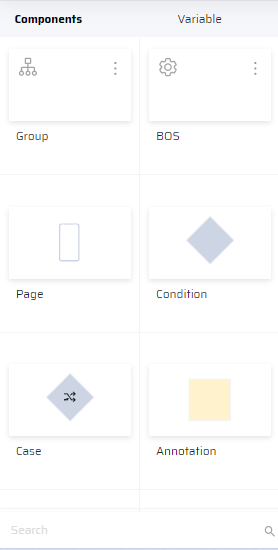 |
If a Workflow Application is created, in addition to the above components the following three components are available for selection:
| Workflow Components | Thumbnail |
|---|---|
| 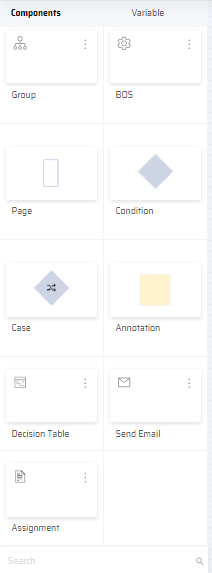 |
When components are dragged and dropped into the canvas, they appear with a default name (Group_1, BOS_1, etc.) that can be changed by double clicking and editing the default name.
The BOS, Case, and Condition components can be converted into Workflow components by selecting 'Execute in Workflow' option from the ellipsis menu.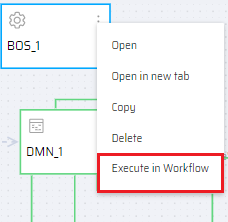
The components with their properties are explained below:
GROUP
Group refers to grouping of App components that perform a specific function.
- When a group component is dragged and dropped on the canvas; double-clicking the group opens a new canvas where the group components can be viewed. A Path is displayed on the top-left of the canvas.
- The App components within a Group must always have one entry point and one exit point.
- The user can click the ellipsis menu to Copy, Delete or Ungroup components in the group.
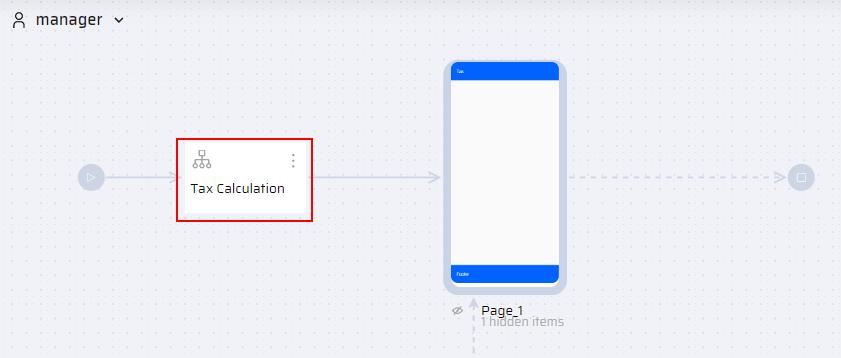
For example, you can add a Group component (Tax Calculation) to hold all BOS components that deal with tax calculation for an organization.
- If a Menu is enabled for the business function, the same menu is also available inside the Group component.
- The user can click Shift, select multiple components, and drag them to any part of the APM canvas. Also, the user can right-click to Create Group of the selected components.
BOS
BOS is designed and developed to fetch or modify data in-and-out of source systems.
- The BOS is given an appropriate name once dragged and dropped.
- Double clicking the BOS redirects the user to the Integration Builder.
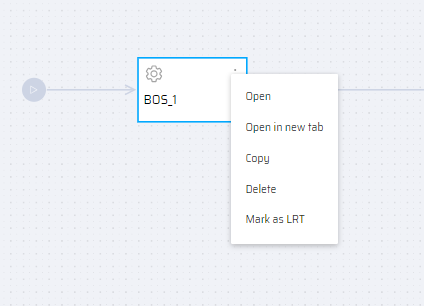
- The ellipsis menu of a BOS consists of the Open, Open in new tab, Copy, Delete, and Mark as LRT options.
- The BOS can be a separate block or can be associated with a specific page.
PAGE
Page refers to the UI screen that is displayed to the user. The UI screen is designed using the App designer.
- The Page component is given an appropriate name once dragged and dropped.
- Double clicking the Page component redirects the user to the App Designer.
- The ellipsis menu of a Page consists of the Copy and Delete options.
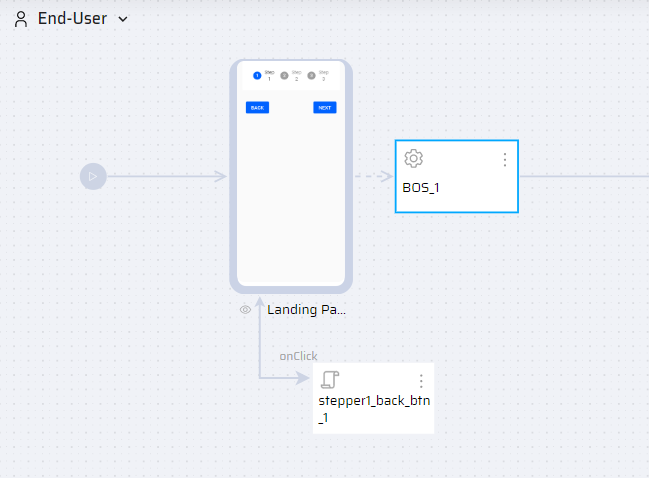
A Page component can be directly connected to a workflow or non-workflow component. Other components like BOS, Case, and Condition must be converted to a workflow component before linking it with a workflow component or while switching lanes.
ANNOTATIONS
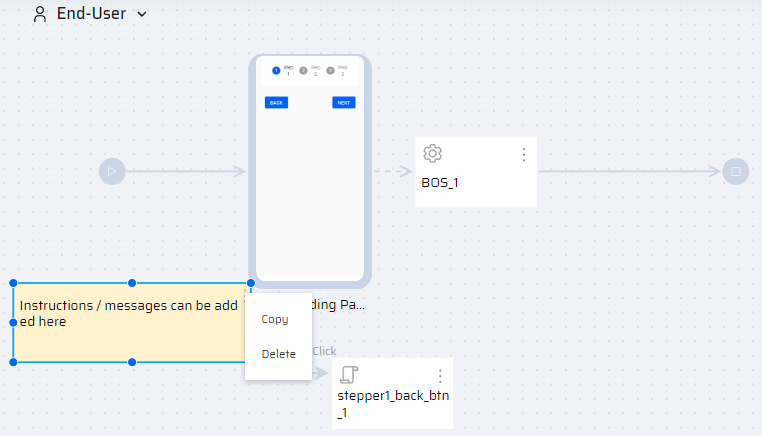
Annotations are instructions/messages that help users add notes at specific points in the canvas.
- Annotations makes it easy to collaborate with different users.
- They can be expanded in size based on the data it displays.
- The ellipsis menu consists of the copy and delete options.
CONDITION
Conditions are used to direct the flow of logic in a business function based on the comparisons of variables defined in the system. It simply means you insert a condition to decide which action to perform based on the input value of the user.

- To add a Condition, drag and drop the Condition component on the canvas and double click the component to enter the condition properties.
- Enter the following information:
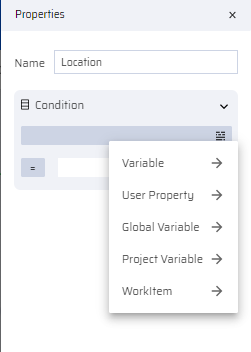
- Name - Name of the Condition block on the canvas
- Condition - The condition is specified by clicking the data icon on the right and selecting the required variables.
- For non-workflow app, select from Variable or User Property options.
- For workflow app, select from Variable, User Property, Global Variable, Project Variable, Workitem options.
- The condition can be compared either with a Value or a Variable.
- You can add more than one condition by clicking OR+.
- Based on the required conditions (YES/NO), the variables are redirected to the respective components.
- The ellipsis menu consists of the Copy, Delete, and Execute in Workflow options.
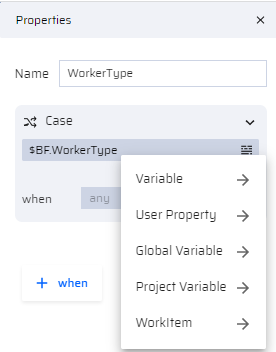
CASE
Case allows you to execute a function by comparing the input value against multiple cases and perform related actions like redirecting to a specific page or BOS. If there is no matching value it is compared with the default value (any) and the related action is taken.
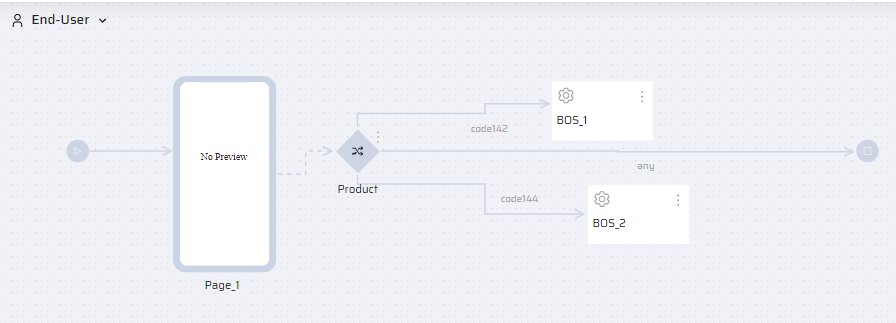
- To add a Case, drag and drop the Case component on the canvas and double click the component to enter the properties.
- Enter the following information:
- Name - Name of the Case block on the canvas
- Case - The case is specified by clicking the data icon on the right and selecting the required variables.
- For non-workflow app, select from Variable or User Property options.
- For workflow app, select from Variable, User Property, Global Variable, Project Variable, Workitem options.
- Click the +when button to enter additional case conditions. You can create multiple case conditions based on your requirement.
- The 'any' is a default condition in the Case component.
- The ellipsis menu consists of the Copy, Delete, and Execute in Workflow options.
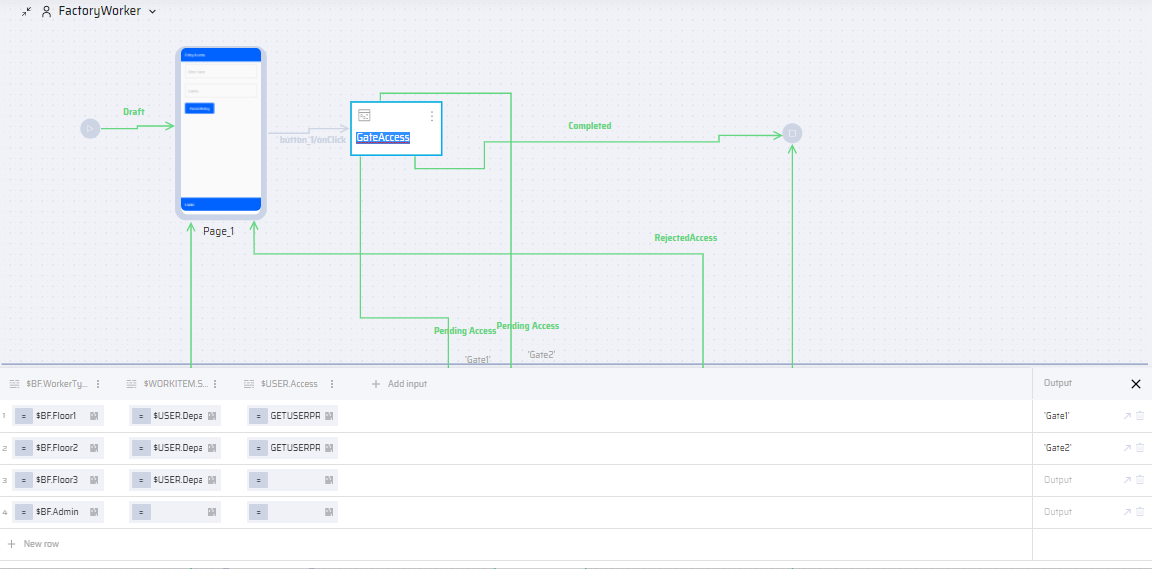
DECISION TABLE
A Decision table (DMN) is a workflow component that helps to compare multiple conditions in a table format, represented in the column headings through variables. Decision tables are best suited for business functions that have multiple conditions. Adding a new condition is done by simply adding another row or column.
Like the if/then rule set, the decision table is driven by the interaction of conditions and actions. The main difference is that in a decision table, the action is decided by more than one condition, and more than one action can be associated with each set of conditions by adding more rows with same condition. If the conditions are met, then the corresponding action or actions are performed. In short, it is similar to a Case component with more options for comparison.
For example, a simple use case for a Decision Table would be: To allow access to factory workers based on Floor, Department, and Shift. These conditions are added as columns variables. Any no of rows can be added and output is assigned for each row.
- To add a DMN table, drag and drop the DMN component on the canvas.
- Click the default name to change it.
- Double click the DMN component to enter the following information:
- Click Add input to add required variables (of type: Variable, User Property, Global Variable, Project Variable, Workitem, and Value). This adds a column to the table. Multiple columns can be added in the same way.
- Click the ellipsis menu to Delete a column.
- Click New row to add row variables(of type: Variable, User Property, Global Variable, Project Variable, Workitem, and Value).
- Enter Output for each row.
- Click the Delete icon to delete a row.
- The ellipsis menu of the DMN component consists of the Copy and Delete options.
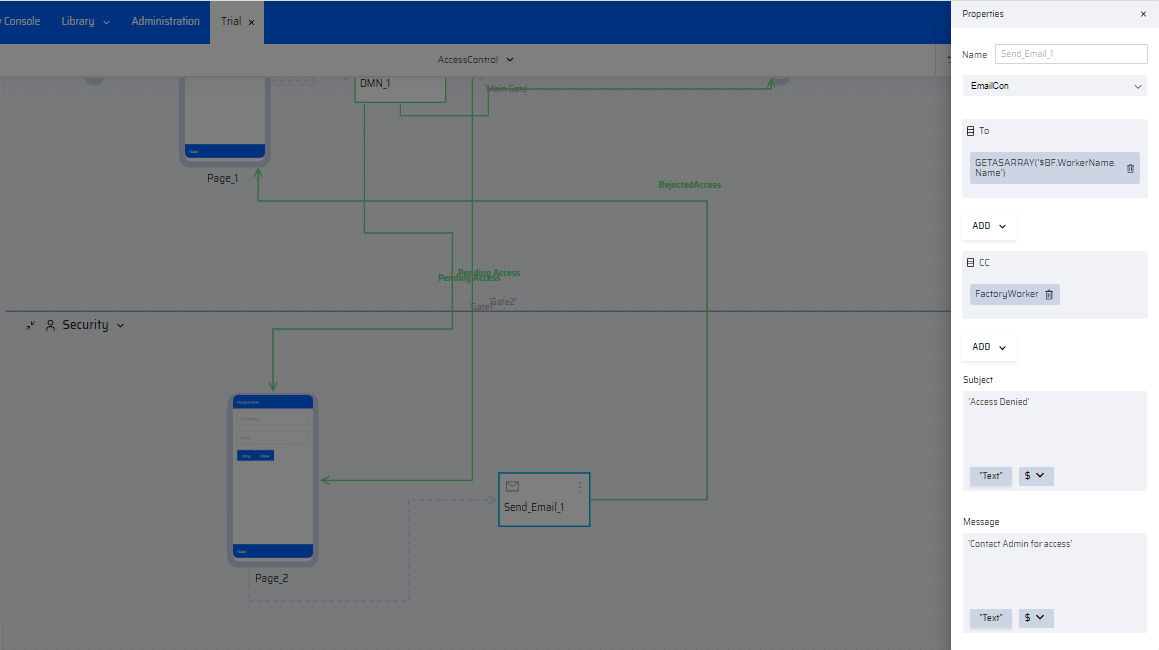
SEND EMAIL
The Send Email is a workflow component. Using this component, the user can send a message to a list of email IDs, workitem creators, and specific user roles in a workflow. The email adapter must be already configured in the Administration -> Integrations tab by adding a New Adapter.
To add a Send Email component, drag and drop the component on the canvas and double click the component to enter the properties.
Enter the following information:
- Name - Non-editable
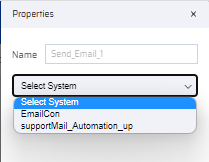
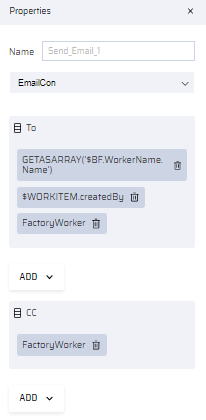
- From the Select System dropdown list, choose the Email adapter. Once chosen, the other fields are displayed.
- Enter To and Cc information. Click ADD to add variables(of type: Variables, Workitem, Roles).
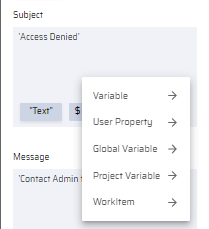
- Enter Subject information. Click Text to add user defined text message or click $ to select from the variable dropdown list (of type: Variable, User Property, Global Variable, Project Variable, Workitem, Functions).
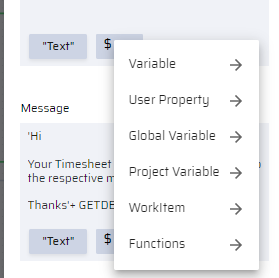
- Enter Message information either by Text or $ variable(of type: Variable, User Property, Global Variable, Project Variable, Workitem, Functions).
- Copy and Delete options are available in the ellipsis menu of the Send Email block.
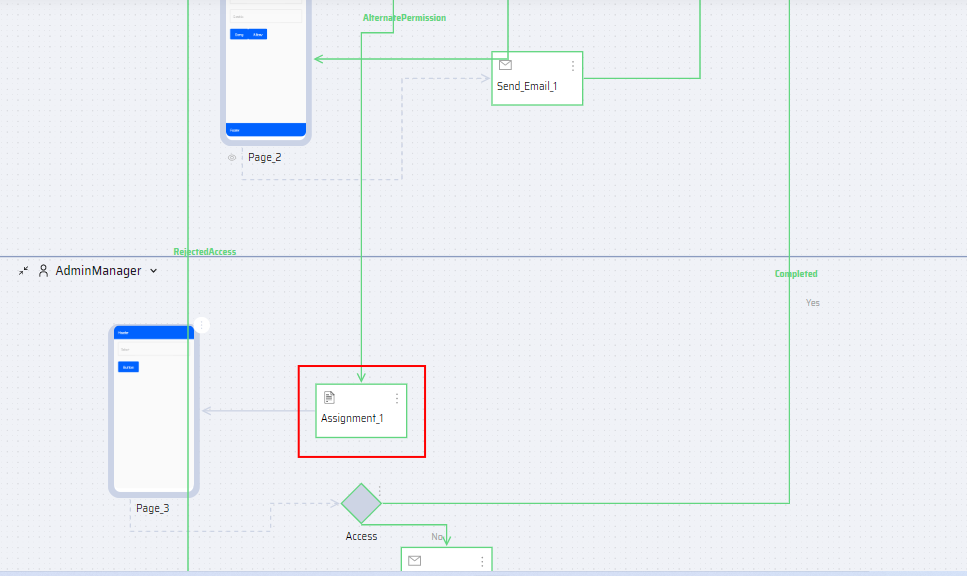
ASSIGNMENT
It is a workflow component used to assign a value to a business function variable or a workitem variable during runtime. This component is used when a developer just needs some assignments to be made without the need of a server side program.
An assignment block is primarily used when a work item doesn’t have a valid 'assignedToUser' or if an 'assignedToRole' must be changed during runtime. In this case, variables can be directly manipulated using assignment block without a need for BOS implementation.
For example: If the security is not available to approve access to a worker, an assignment component can be added to send the workitem to the Admin dept.
- To add an Assignment component, drag and drop the component on the canvas and double click the component to enter the properties.
- Enter the following information:
- Name - Non-editable
- Select Variables of type (Variable and Workitem) or other workitem properties
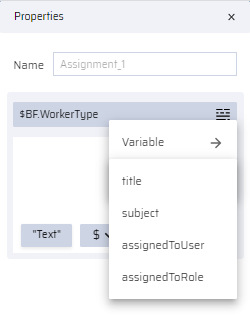
- Enter input Text, or add data through variables (of type: Variable, Global Variable, Project Variable, Workitem).

- The ellipsis menu of the assignment component consists of the Copy and Delete options.