My App design consists of a workflow process where a form needs to be approved at two levels. How do I set the workitem state at each level?
In a workflow app the navigational arrows help to connect app components in two lanes(levels). While connecting two lanes, these arrows denote a particular state of the action. For example: 'Pending Approval'. The default states are 'Draft' and 'Completed'. Right-click the arrow and define a 'New Sate' if required.
The following usecase provides an insight into defining the workitem state at two levels:
Use-Case: This is a timesheet app. The employee submits a time sheet for approval at two levels.
- Level 1 - Manager 1 - Here Manager 1 approves/rejects the timesheet using Approval App 1. If Approved, the workitem goes to Manager 2 for approval. If rejected, the workitem goes back to the employee for re-submission.
- Level 2 - Manager 2 - Here Manager 2 approves/rejects the timesheet using Approval App 2. If Approved, the workflow is completed. If rejected, the workitem goes back to the employee for re-submission.
Workitem States Defined for the Usecase:
Steps
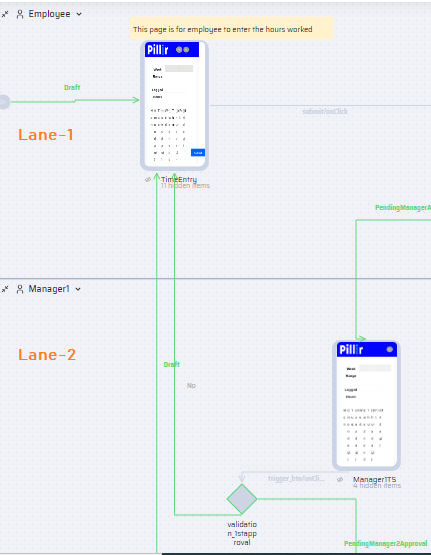
- Draft - This is a default state in a workflow. It points to the timesheet form(TimeEntry page) where the employee fills the timesheet. The employee clicks Submit after entering the timesheet.
.png)
- A State_Change BOS is added to facilitate state change. Right-click and select 'Execute in workflow'.
.png)
- Connect the BOS arrow to Manager1TS page in Lane 2. Right-click the arrow and define the state as 'PendingManagerApproval'.
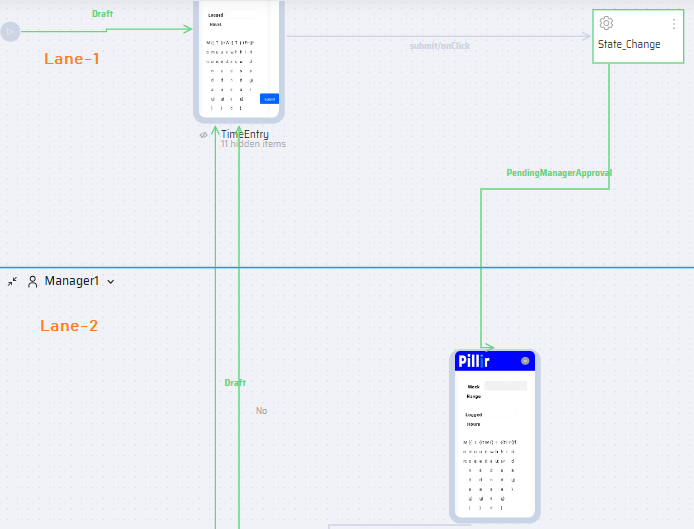
When the employee clicks 'Submit', the workitem state changes from 'Draft' to 'PendingManagerApproval'.
You cannot connect lane 1 page component directly to the lane 2 page component, since they are non-workflow components.
- A Condition(validation_1stapproval) component is added in lane 2. Right-click and select 'Execute in workflow'.
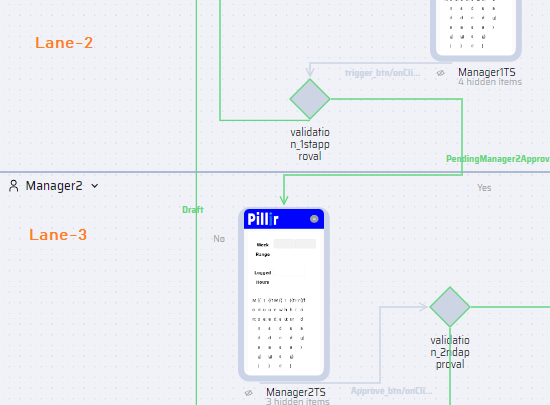
- The 'Yes' arrow of the condition is connected to lane 3 Manager2TS page.
- Right click the arrow and define the state 'PendingManager2Approval'.
- The 'No' arrow is connected to the TimeEntry page. Set the state as 'Draft'.
The condition checks if the workitem status is 'Approved'. If approved, it connects to the lane 3 Manager2TS page. If the status is 'Rejected', it connects to the TimeEntry page.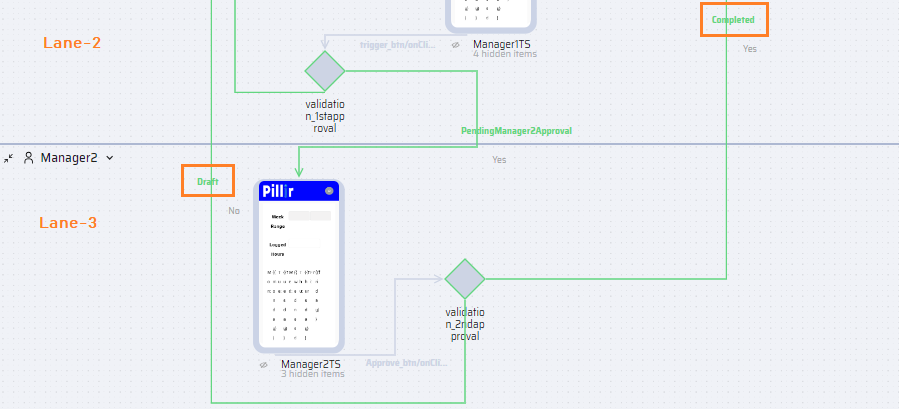
- A Condition component is added in lane 3. Right-click and select 'Execute in workflow'.
- The 'Yes' arrow of the condition completes the workflow.
- Right click the arrow and define the state 'Completed'.
- The 'No' arrow is connected to the TimeEntry page. Set the state as 'Draft'.
The condition checks if the workitem status is 'Approved'. If approved, it connects to the end. If the status is 'Rejected', it connects to the TimeEntry page.
Points to Consider
- Do not define multiple workitem states in the same lane. It leads to less clarity in the App design and complicates future customizations.
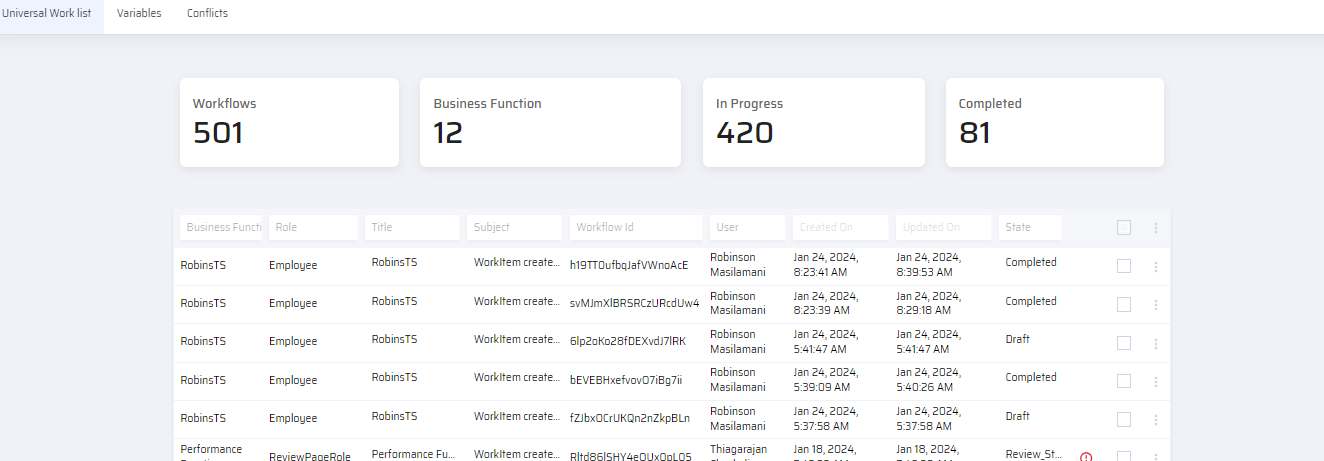
- Each workitem and its state can be seen in the Console > Universal Worklist Log.