To enable the EdgeReady Plugin to establish connection with SAP system, the RFC destination details of the SAP system must be configured using the SAP NetWeaver Destination service.
- Open the SAP NetWeaver Application Server Java, and select SAP NetWeaver Administrator.
- Login to SAP NetWeaver Administrator.
- In the SAP NetWeaver screen, navigate to Configuration Management > Destinations.

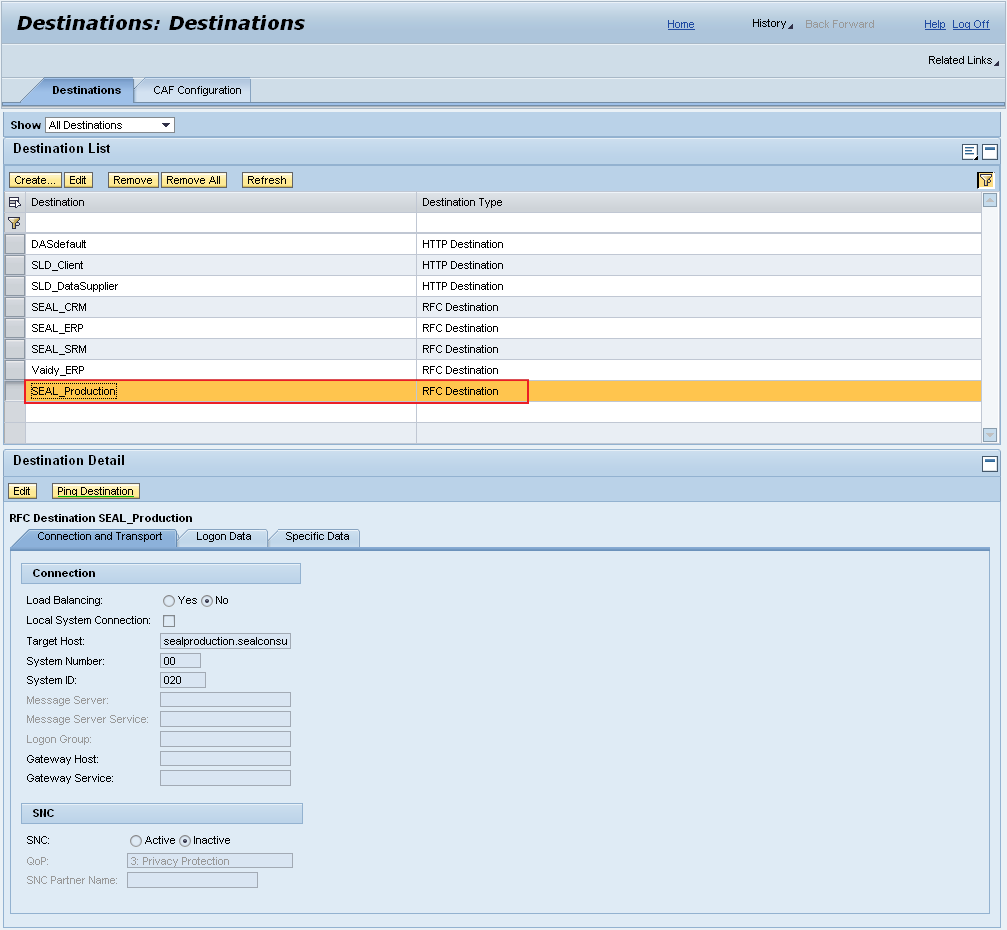
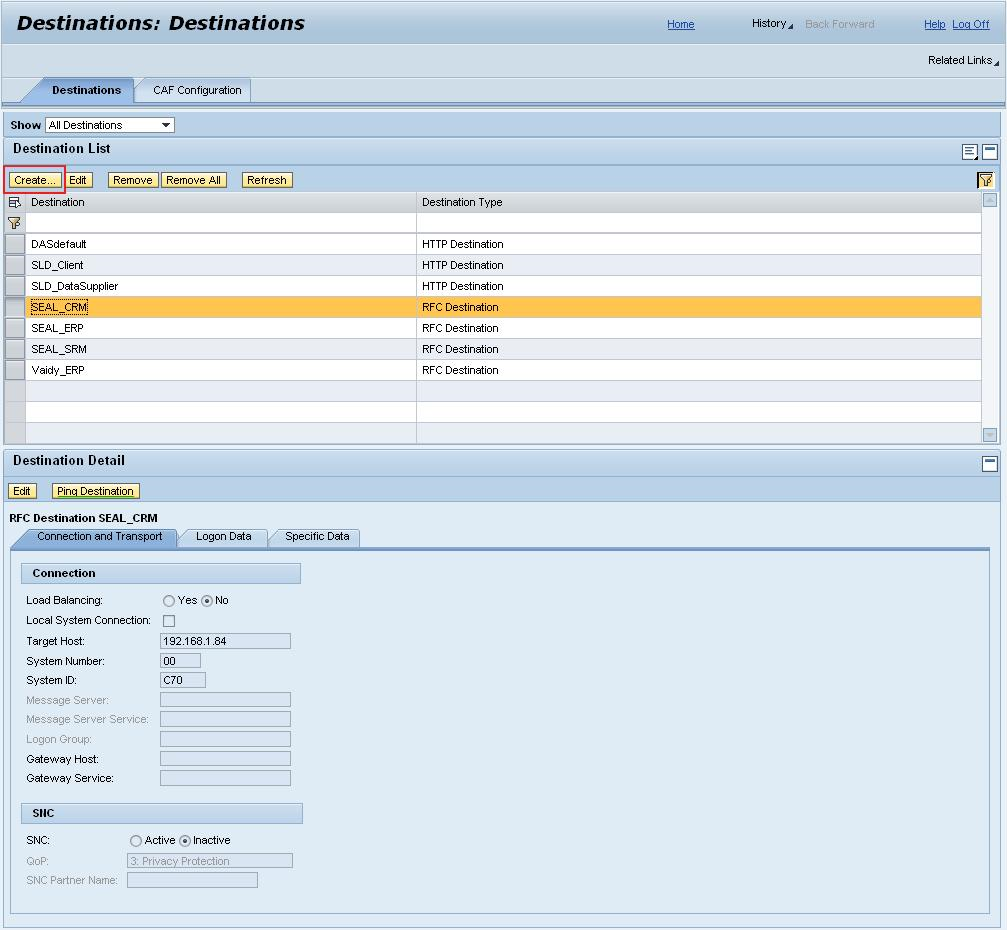
In the Destination service screen, you can create and manage RFC destinations of each SAP system to which the Plugin has to communicate. The following screen includes a Destination List with the list of existing destinations. Select a destination to see its details in the lower pane.
- To create a new destination, click Create.
- In the Destination Wizard - General Data screen, enter the following information in the corresponding fields.
| Field | Value |
|---|---|
| Hosting System* | System where the destination is located. |
| Destination Name* | Name of the destination system. |
| Destination Type* | RFC |
| Note: Fields marked with asterisk*are mandatory fields. | |

- Click Next to continue.
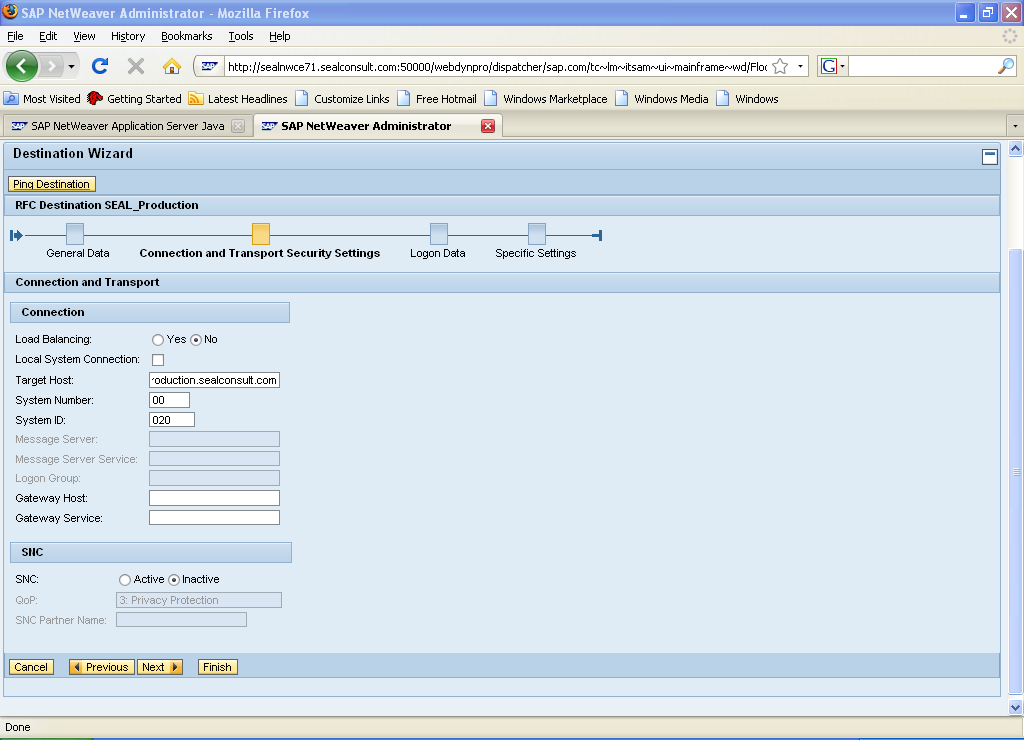
- The Connection and Transport Security Settings screen appears. Enter the following parameters for the connection to the SAP system.
| Field | Value |
|---|---|
| Load Balancing | Select No. |
| Target Host | Name (IP address) of the host system |
| System Number | Number of the host system. |
| System ID | ID of the host system. |
| Gateway Host | If the destination is a registered RFC server program, enter the name of the gateway host. |
| Gateway Service | Enter the gateway service |
| Note: If you use load balancing, then select load balancing as Yes, and specify the system ID, message server, and the logon group details. | |
The Logon Data screen appears where you can specify the login details of the user authenticated to use the RFC connection.
- In the Authentication section, select Authentication as Technical User.NoteIf you use a current user for the connection, then you must specify whether a logon ticket or an assertion ticket should be used for current user authentication. In this case, you should specify Authentication as Current User (Assertion Ticket) or Current User (Logon Ticket) as required.
- Enter the Language, Client, User Name, and Password details of the authenticated user in the respective fields.
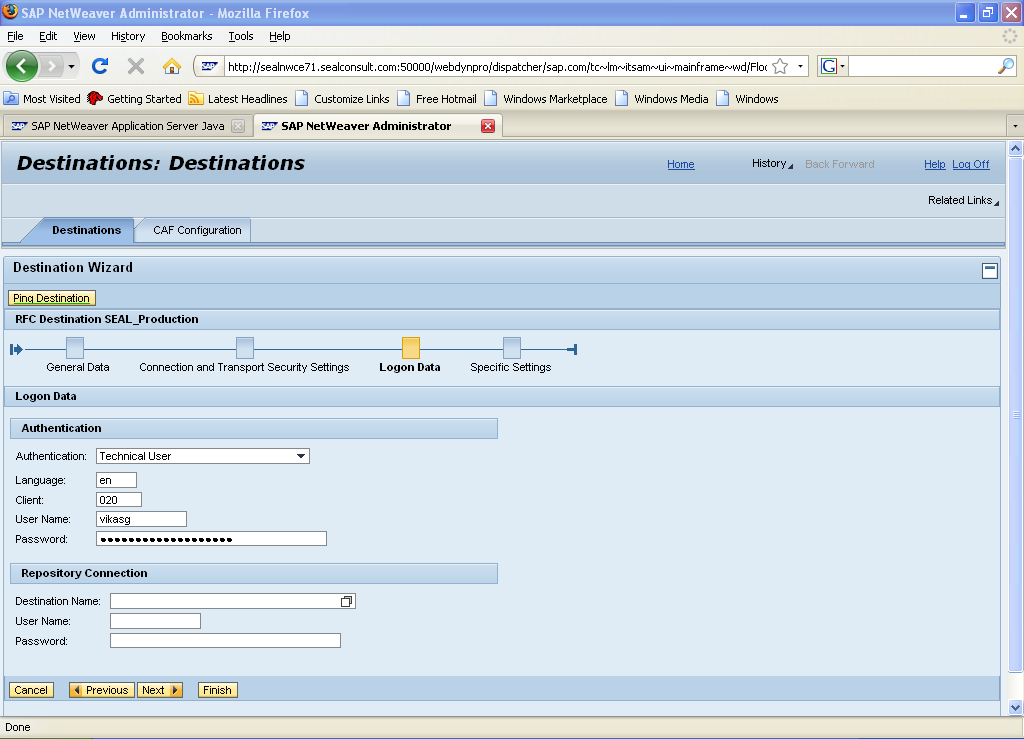
Note
If the user specified for the connection does not have the authorization to access the SAP system repository, then enter the connection information of the repository that the user can access.
- Click Next to continue.
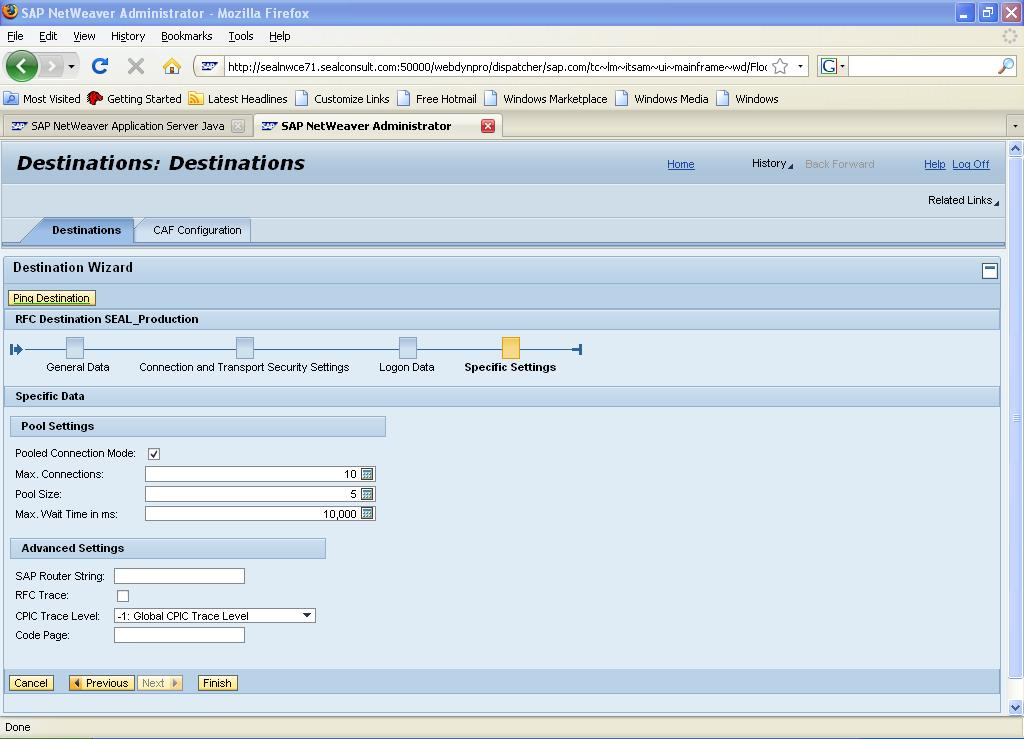
- The Specific Settings screen appears. In the Pooled Settings section, select the Pooled Connection Mode check box, and enter the pool connection parameters accordingly.
- In the Advanced Settingssection, enter the required settings for SAP router and RFC trace information.
- If a SAP router is used for the RFC connection, then enter the SAP router connection information.
- To activate the RFC trace, set the corresponding indicator.
- Click Finish. The new destination will be displayed in the Destination List.