Q:My App design consists of tabular data to be displayed in the UI. Some columns in the table must be shown/hidden based on user role. How do I design for this requirement using the app designer?
A: The recommended approach for this usecase is to design separate pages for each role. Based on the role, you can define a page with a table and the required columns.
This approach has the following advantages:
- Simple Design and Navigation - Each page will specifically cater to the needs of a particular role, making the design and navigation straightforward.
- No Complex scripts - You need not add any additional logic(such as adding behaviors) to handle column visibility. Each page can have its own predefined set of columns.
- Easy Future Customization - It will enable you to add more role-specific customizations in future in the defined pages.
What to Avoid?
It's important to refrain from having all the data in a single page and trying to manipulate column visibility through scripts(behaviors). This will lead to:
- Unnecessary code scripts which could otherwise be achieved through simple page navigations.
- Future changes or customizations would involve adding more code to the existing logic.
Sample Usecase
In this usecase, there are 2 roles - Developer and Approver, Any(default condition). Based on the role, a table with specific set of columns must be displayed to the end-user.
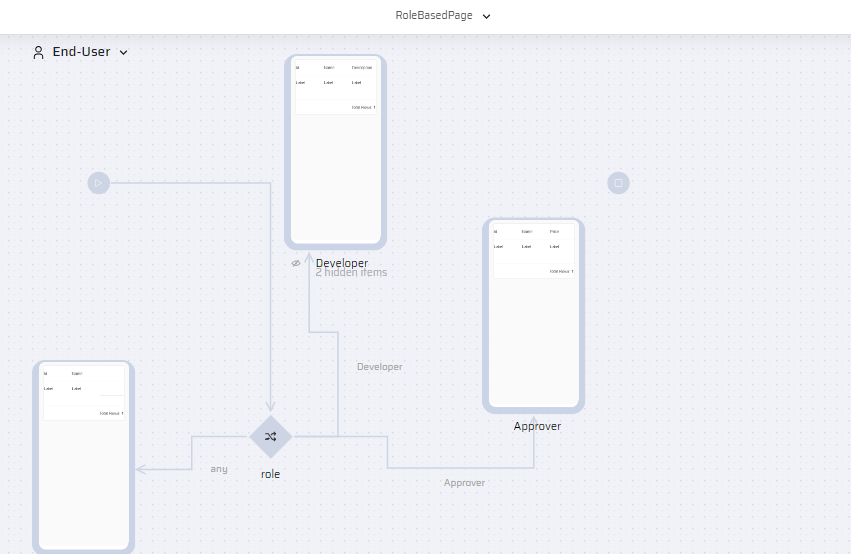
You need to design in the APM in the following manner:
- Drag and Drop a Case component. Double click to open the Properties.
- Name the component Role. Click the variable icon and map the Role variable to the component. (this variable must be created under "Add Variable" section.)
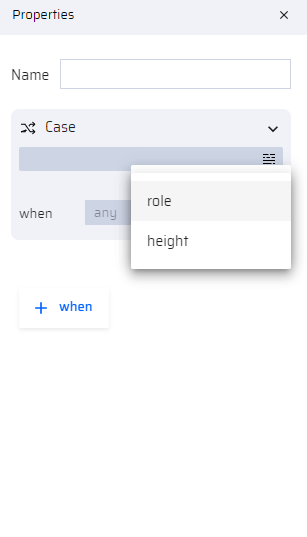
- Add 2 conditions to the Case component:
- Approver
- Developer
- Drag and drop 3 Page components (Developer, Approver, and Any).
- Add the required table components (Table, or Datagrid, or ListView) to display the tabular data (add role specific columns for each page).
- Connect the case component arrows to the corresponding pages:
- Approver condition arrow to the Approver page.
- Developer condition arrow to the Developer page.
- Any (default) condition arrow to the Any page.