Q: I need to display a table with three columns. Based on the data entered in column A, column B and Column C must be enabled / disabled. How do I design for this requirement in the App Designer?
A: This requirement belongs to the "form validation" category and can be designed in multiple ways. Since it is tabular data, the following usecase uses a Datagrid component to display the data and a Dialog box component to set the validations.
This approach facilitates efficient handling of tabular data while allowing customization of validations through the Dialog box component.
Sample Usecase
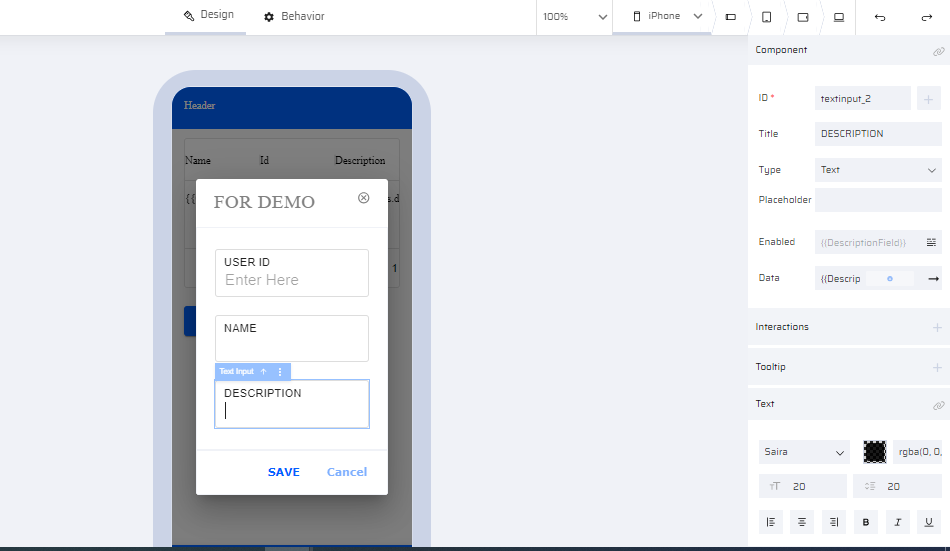
Based on user ID, the Name and Description fields will either be enabled or disabled. Subsequently, the user-entered data will be displayed in a table format.
Steps
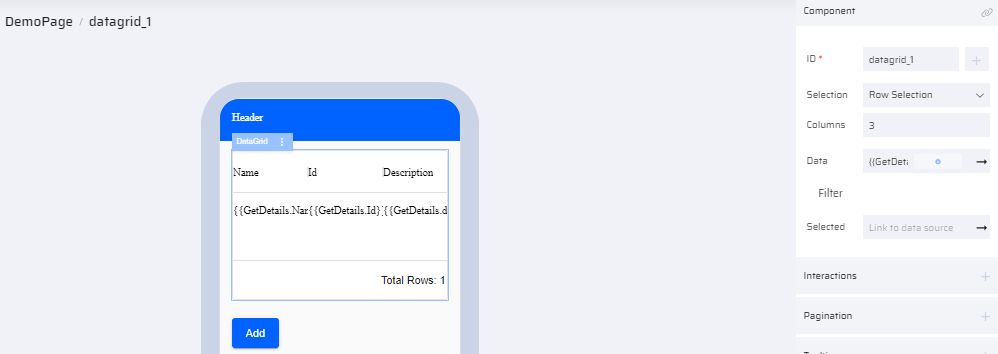
- Drag and Drop a Datagrid component to the DemoPage component. Modify properties as below:
- Selection - Row Selection
- Columns - 3
- Data - Map to table variable GetDetails (created in "Add Variable" section)
- Click the Header cell. Modify properties as below:
- Label - Name
- Editable - Disable
- Data - GetDetails.Name
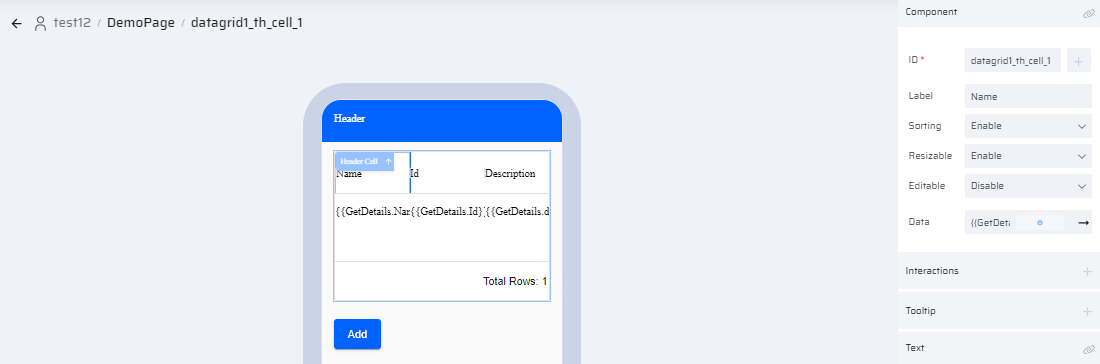
Repeat the above step for all header cells and map to related variables.
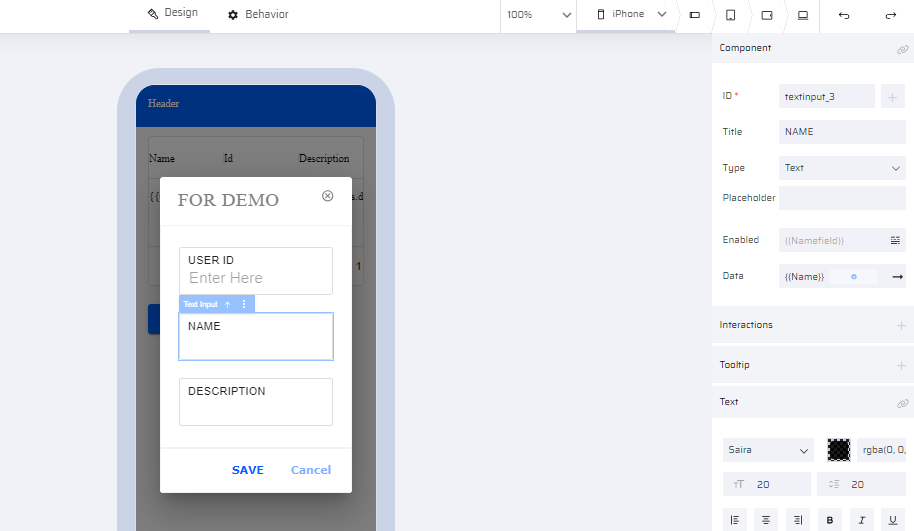
- Add a Dialog box component to the page.
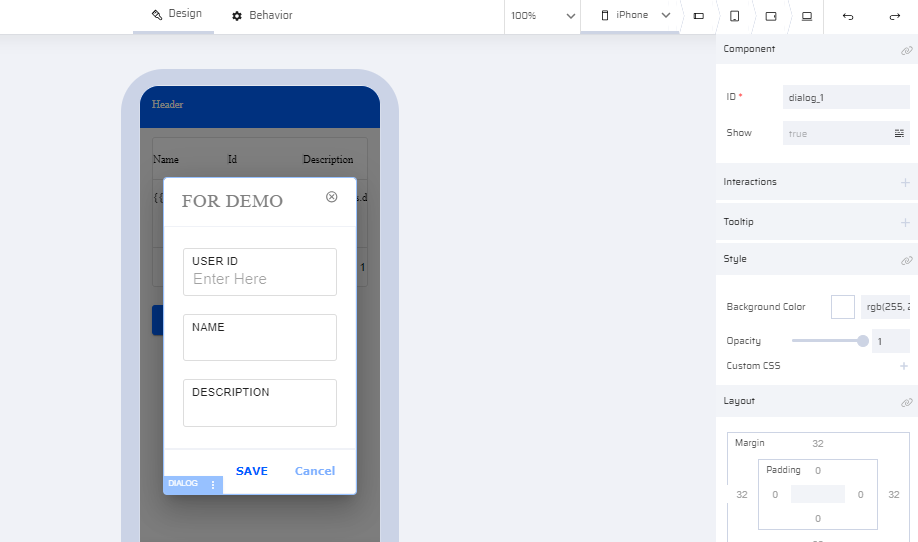
- Modify the component to have 3 Text input components. This will correspond to the 3 columns of the datagrid.
- Modify the properties as shown in the image. Add the related variables.
.png)
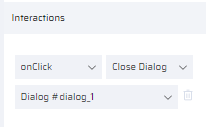
- Click the Save button within the Dialog box. Add the following interactions:
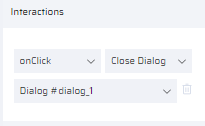
- Click the Cancel button within the Dialog box. Add the following interactions:
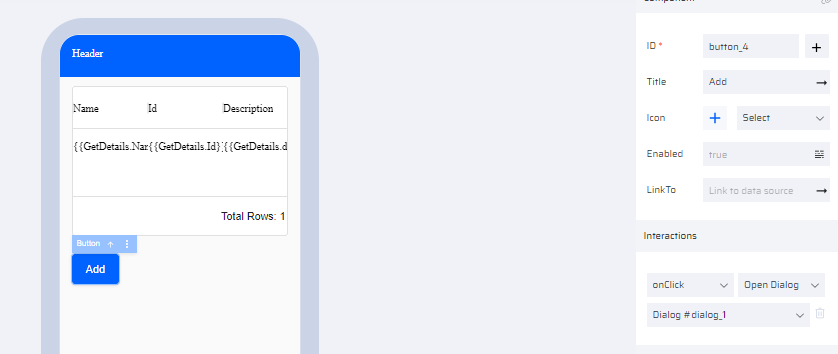
- Add a "Add" button below the Datagrid. Add the following interactions:
Adding the Logic
In the database create a Table DetailsData with Id, Name, and description as columns.
Add a BOS(Get Details) to the DemoPage. This BOS retrieves the data from DetailsData database table.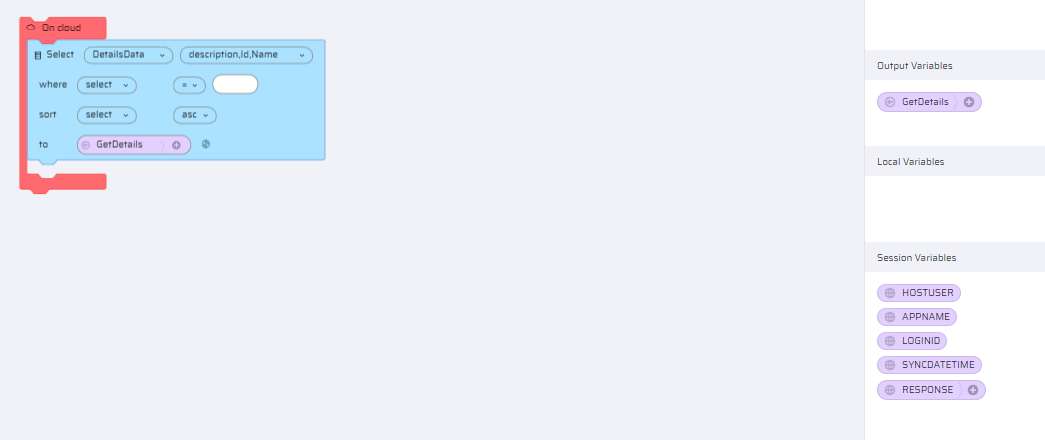
Add another BOS(Insert) to the DemoPage. This BOS inserts the user entered data to DetailsData database table.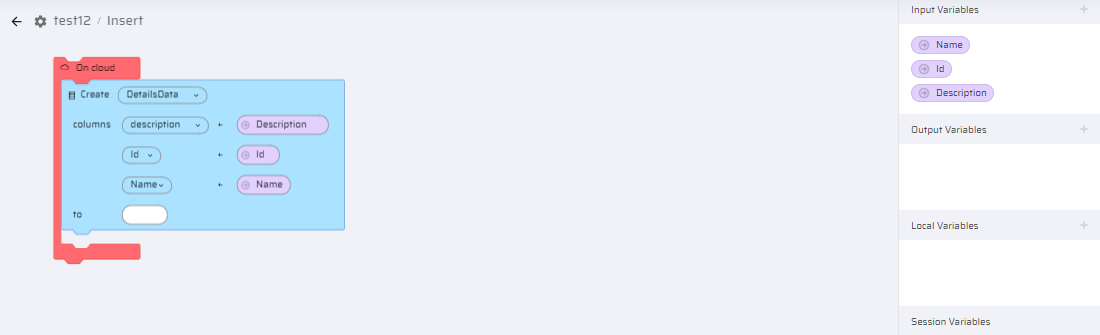
Adding Behaviors
Add an onPageShow event to the DemoPage. Add logic as in image. This logic will retrieve the data from the database table and display in the datagrid.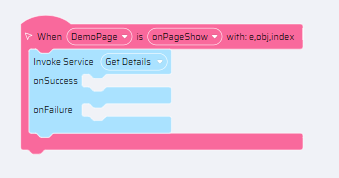
Add the following logic for the ID text input field inside the Dialog component. This logic validates the user-entered ID and enables/disables the fields.
Add the following logic to the Save button inside the Dialog component. This logic inserts the user-entered data in the database table and prints a success message.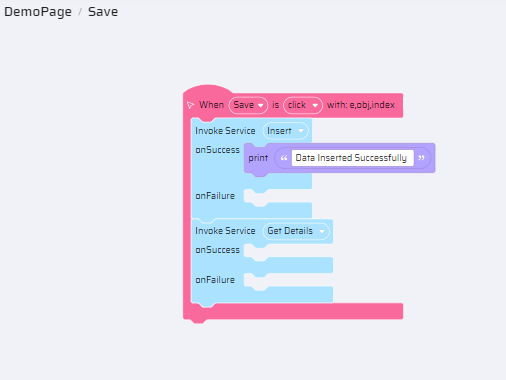
After designing the App, preview it to check the build. <<sample>>
Point to Remember
Avoid customizing the Datagrid component for validations like enabling/disabling cells based on other cells. This implementation will require adding more logic to the component. Instead, use components like Dialog boxes to add validations to the data. Transfer the validated data to the Datagrid for display.