Installation Steps
- Download the EdgeReady ABAP Plugin.NotePlease contact your Pillir Customer Enablement Manager for the EdgeReady ABAP Plugin download link.
- Copy the downloaded ABAP Plugin to the install directory on the SAP ECC or SAP S/4HANA instance.
- Install Directory (Windows): <Drive>:\usr\sap\trans\EPS\in
- Install Directory (Linux):/usr/sap/trans/EPS/in
- Login to the SAP ECC or S/4HANA instance Client 000.
- Open TCode: SAINT and follow the steps to load the available add-on files from the Front-end server
- Menu – Installation Packages -> Load Packages -> SAR Archive from Frontend
- Select the add-on as shown in the below screenshot and complete the installation process.

Configuration Steps
After installing the ABAP Plugin (.PAT) file in the SAP ABAP environment, do the following:
Step1 – Activate Gateway
Go to SPRO -> SAP Customizing Implementation Guide -> SAP NetWeaver -> Gateway -> OData Channel -> Configuration -> Activate or Deactivate SAP NetWeaver Gateway to activate Gateway services.
OR
Use transaction: /n/IWFND/IWF_ACTIVATE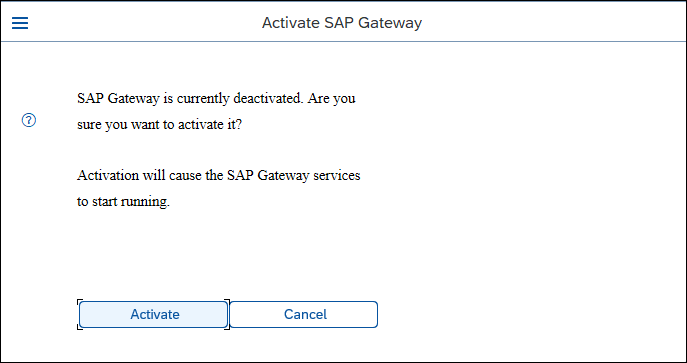
Step2 – Activate and Maintain Services
- Use Transaction /n/IWFND/MAINT_SERVICE
This transaction displays the Service Catalog that is available in the ABAP stack. In the list, four(4) Pillir services are visible. If the Pillir services are not visible, the installation of the ABAP Plugin add-on was not successful.
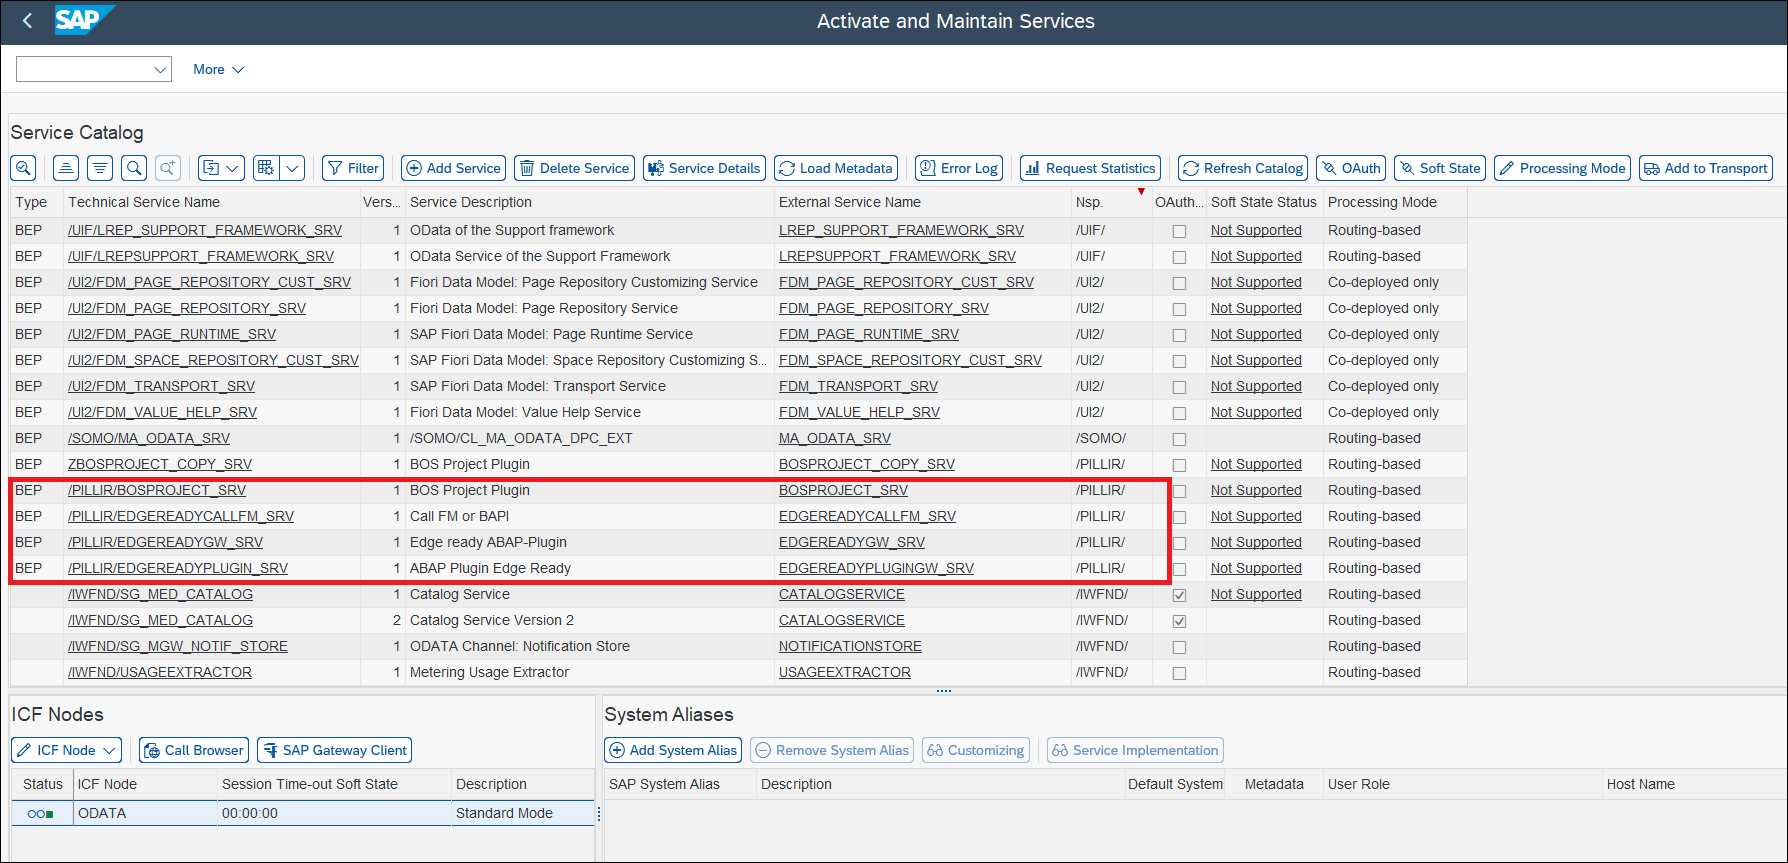
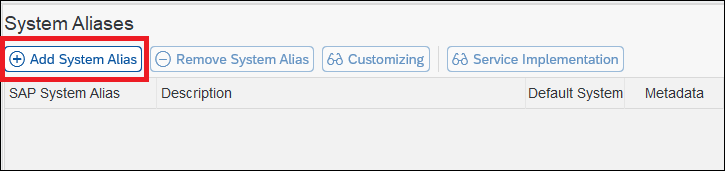
- In System Aliases click the Add System Alias button.
- In the next screen, do the following:
- Select all of the Pillir services in the Service Doc Indentifier column.
- Select the SAP System Alias as Local.
- Select the Default System check box for all the services.
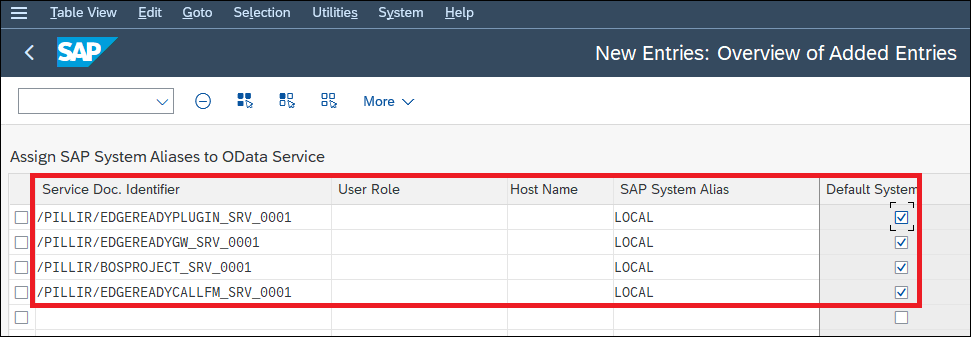
- Save the System Aliases by assigning a Transport Request.
- After the System Alias is created, select each of the services and click the Load Metadata button.

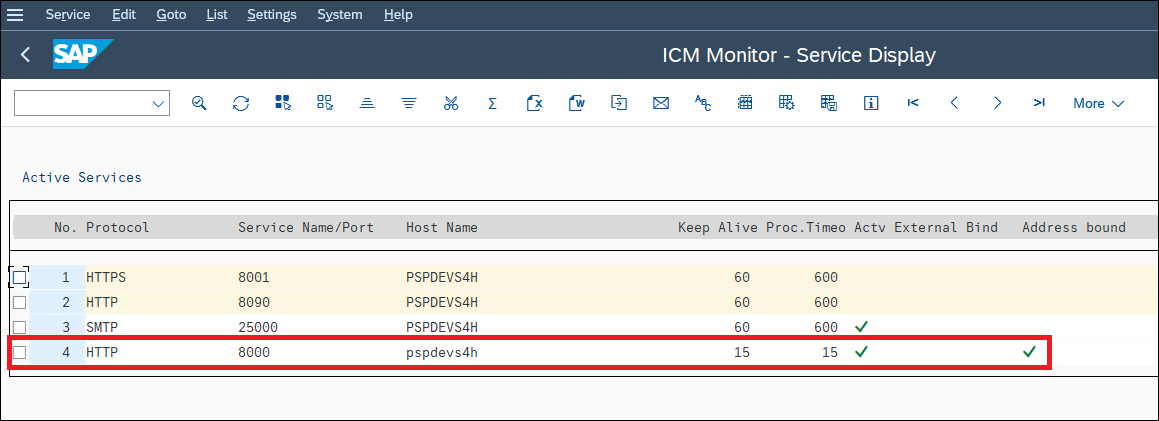
Step3 – ICM Monitor: Service Display
- Use transaction SMICM and navigate to the Services using the below menu path:
Select menu Goto -> Services
- Maintain HTTP or HTTPS service entry as shown below and ensure that its active.
Step4 – Test Service using SAP Gateway Client
- Use transaction /n/IWFND/GW_CLIENT
- Configure the Request URI to /sap/opu/odata/PILLIR/EDGEREADYGW_SRV/FuncSearchSet?$filter= Funcs eq 'BAPI*ORDER*CREATE*'
- Set Protocol to HTTP and Method to GET.
- Click the EXECUTE button.
The JSON response will be the list of BAPI’s/RFC’s that match the criteria.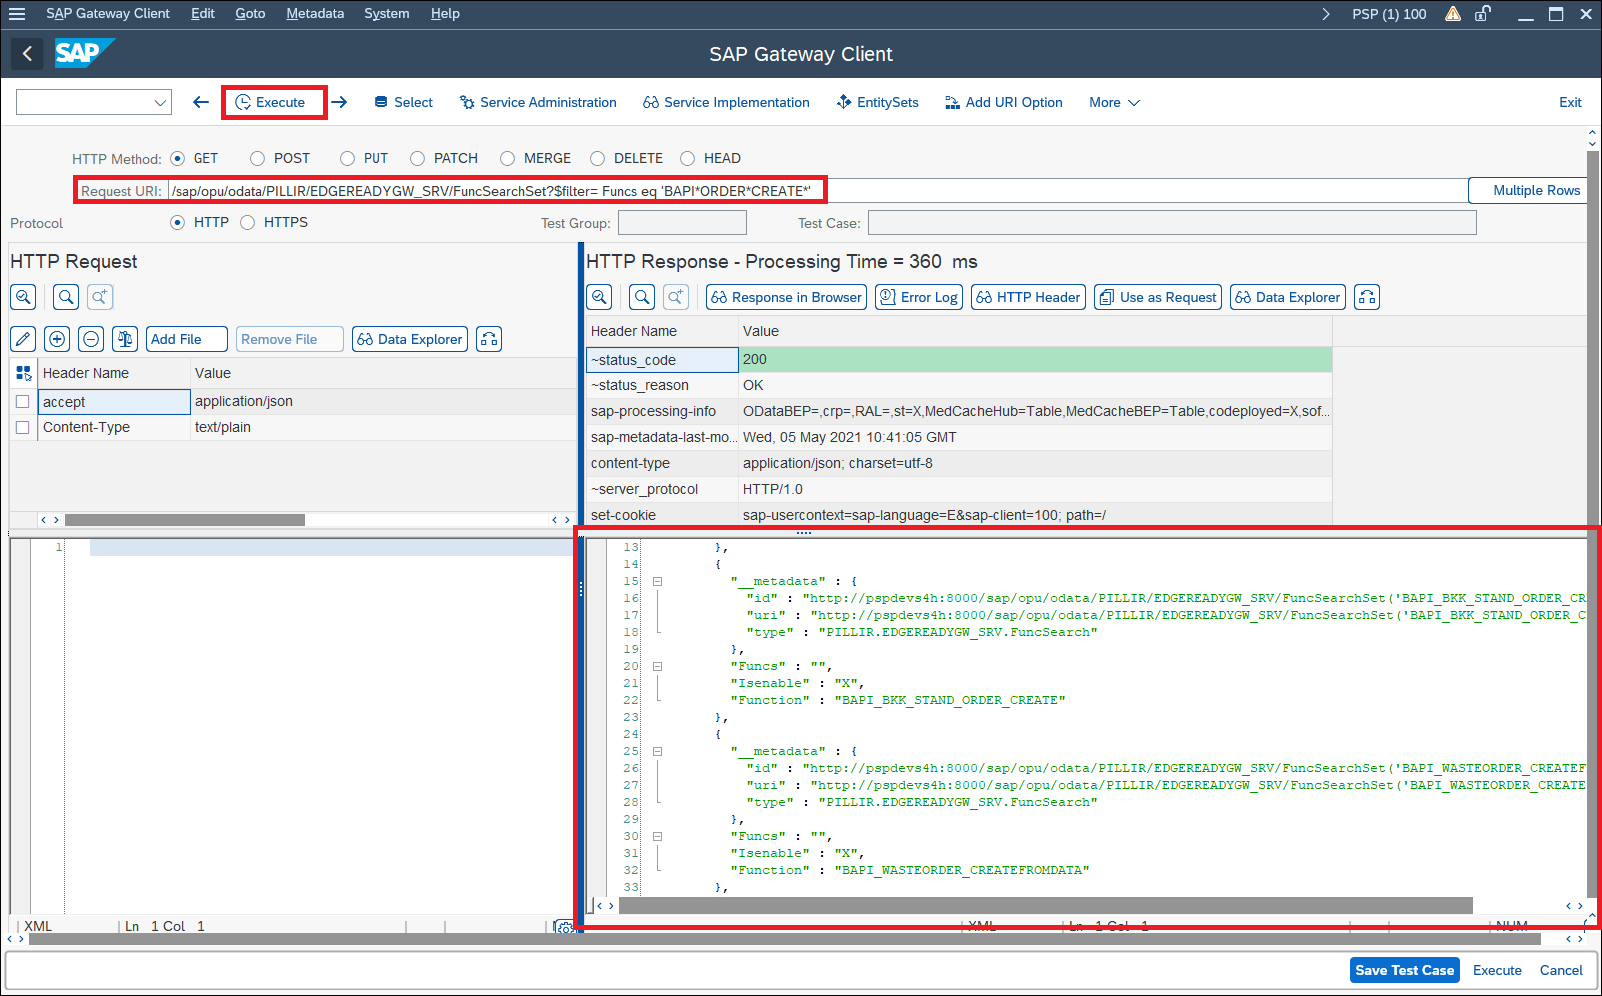
If the JSON response is visible in the lower right end, the ABAP Plugin add-on has been successfully imported and configured.