In the developer site developer.apple.com, the user is registered as a particular organization under an Enterprise program or a Developer program.
The Enterprise Program enables the user to generate Enterprise Certificates while the Developer Program enables the user to generate App Store Certificates.
For both the certificates there are three major steps. This document holds the information on:
- How to manually generate iOS certificates
- How to create a Provisioning Profile
- How to create an App Identifier (For both App Store and Enterprise Apps)
This document aids the customer in generating Enterprise Certificate for their Projects.
Both Enterprise and App Store certificates follow the same sequence except for a few minor differences in option selections.
Refer to App Store Certificate document for understanding how to generate App Store Certificates.
Based on the role of the user, there are 2 sections available, namely:
- People - where the user can add people and manage other accounts
- Certificates, Identifiers, and Profiles - where the user can generate certificates
-1.png)
The App Store certificate Homepage consists of 3 options while the Enterprise homepage does not have the App Store Connect option.
Creating an Enterprise Certificate
In the Certificates, Identifiers and Profiles section, users can create and generate new certificates and view existing certificates.
-2-.png)
The users can click the + button to generate a new certificate.
Adding a new certificate redirects the user to a page where they are provided with multiple options for creating certificates related to Software, Services, or Intermediate certificates.
The user can create a Enterprise certificate through the following steps:
1. During certificate generation, the user has to select the option In-House and Ad Hoc under the Software section.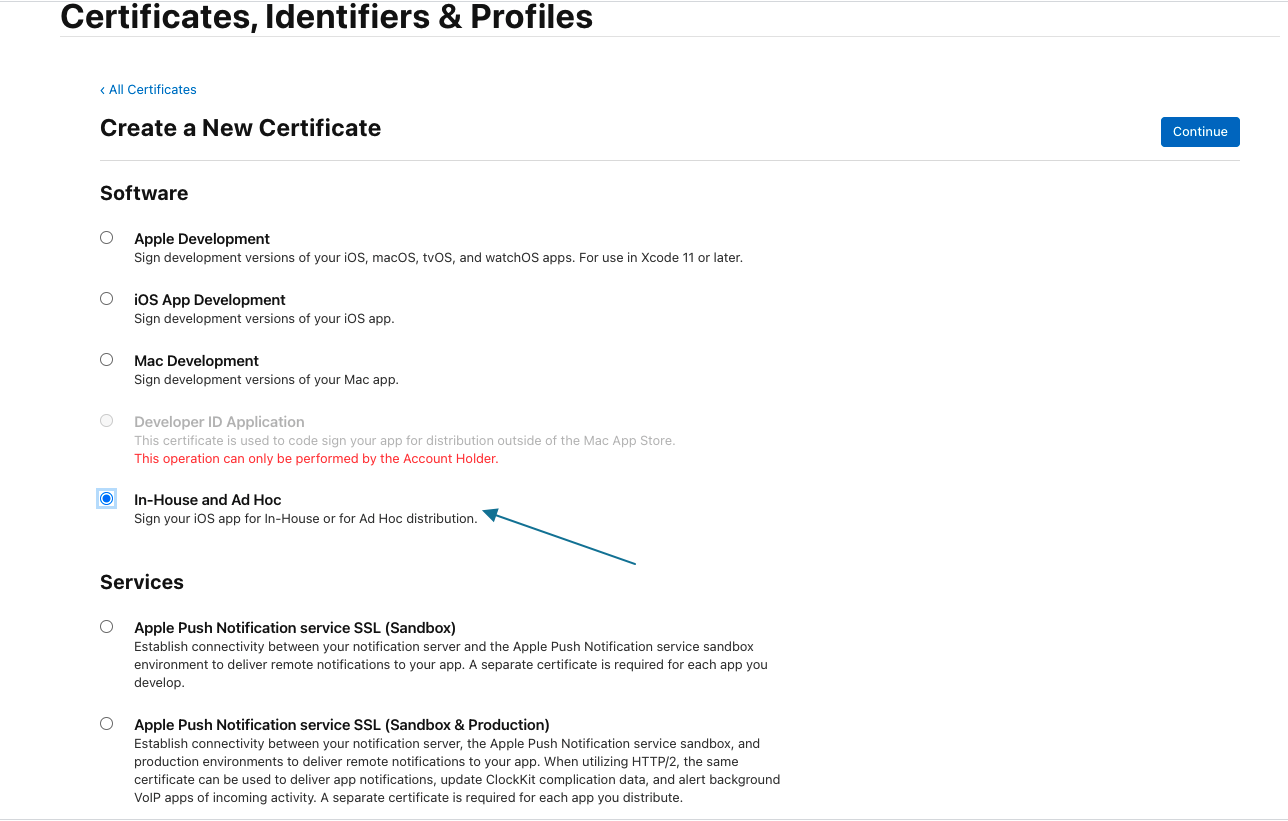
For App Store certificates, users select the iOS Distribution (App Store and Ad Hoc) option.
2. After the In-House and Ad Hoc option is selected, the user clicks Continue.
3. The user is requested for a Certificate Signing Request(CSR) that needs to be uploaded to generate the new certificate. This is done using the Keychain Access.
-3.png)
4. On opening the Keychain access, the user has to select the Certificate Assistant from where they can request a certificate from a Certificate Authority.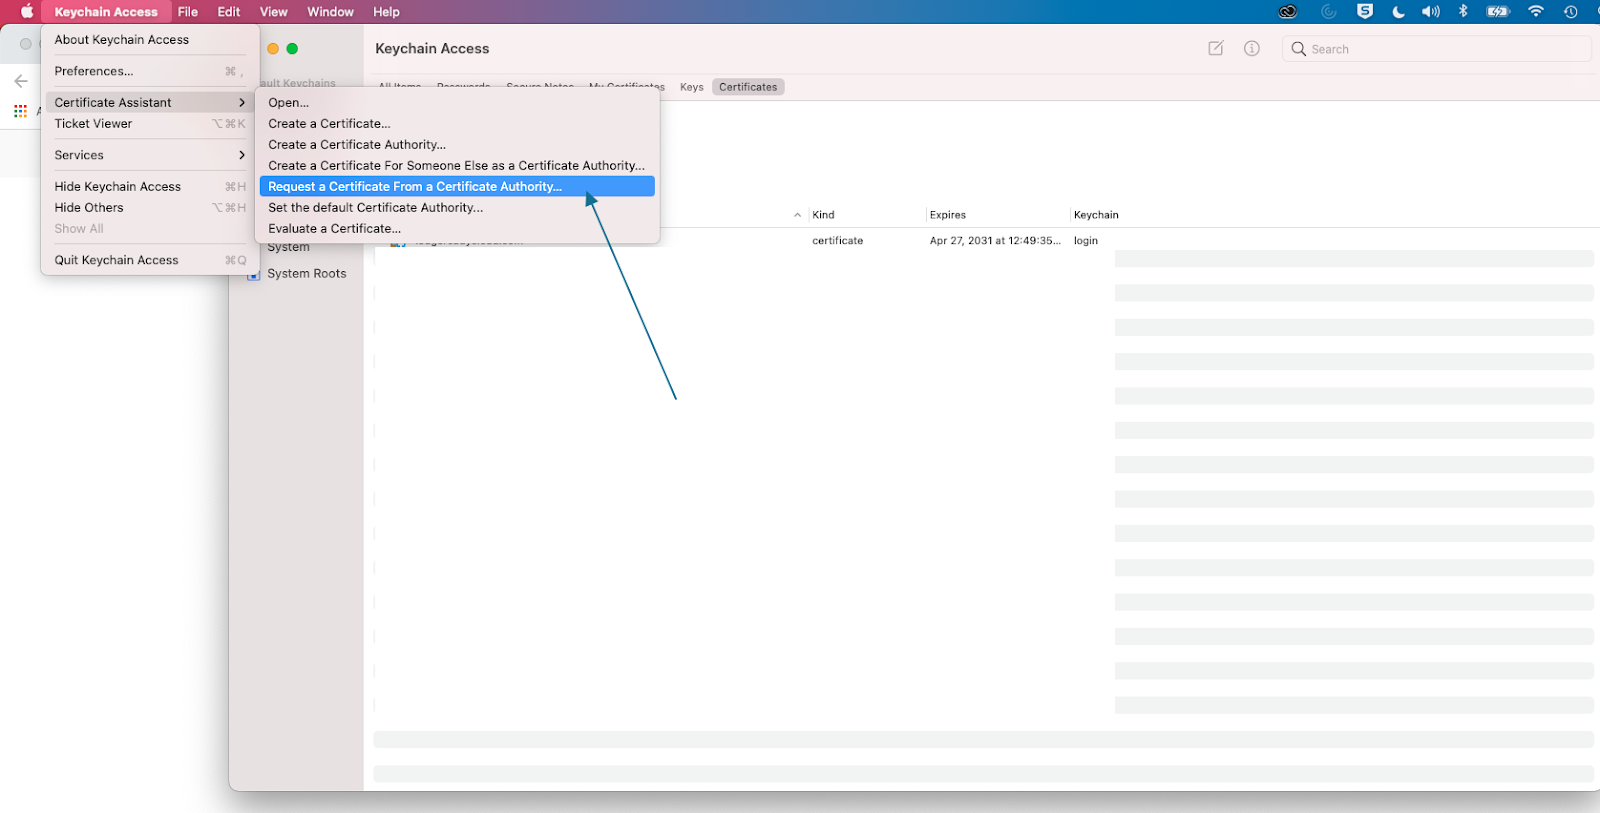
5. This certificate is provided by a certificate authority to the users of a particular organization. It can be accessed by providing the name, email, and details in the Certificate Assistant popup of the Keychain Access.
-4(1).png)
The certificate is saved in the local drive.
-5.png)
6. Once the certificate details are saved, it is uploaded to the developer site.-6.png)
7. The certificate details such as Name, Type, Expiration date, and Created By are displayed and the certificate is available for Download.-7-.png)
How to generate App Identifiers?
The Identifiers page can be accessed from the certificates homepage on the left. While certificates are universally accepted for the company, the App identifiers are uniquely specified for each App created in the platform.
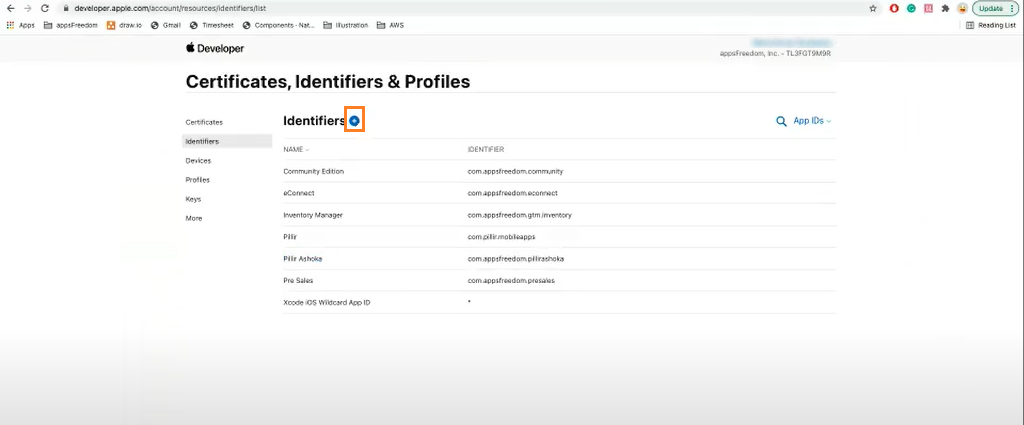
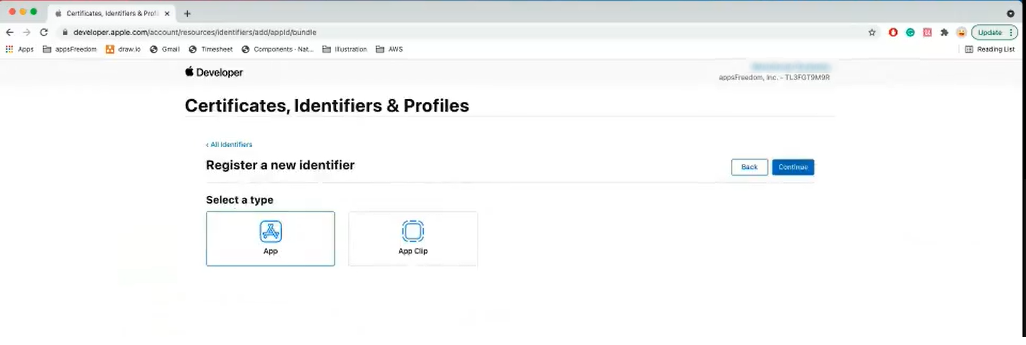
Clicking the + button redirects users to a page with a list of identifiers. Here the users can register a new App ID and click Continue.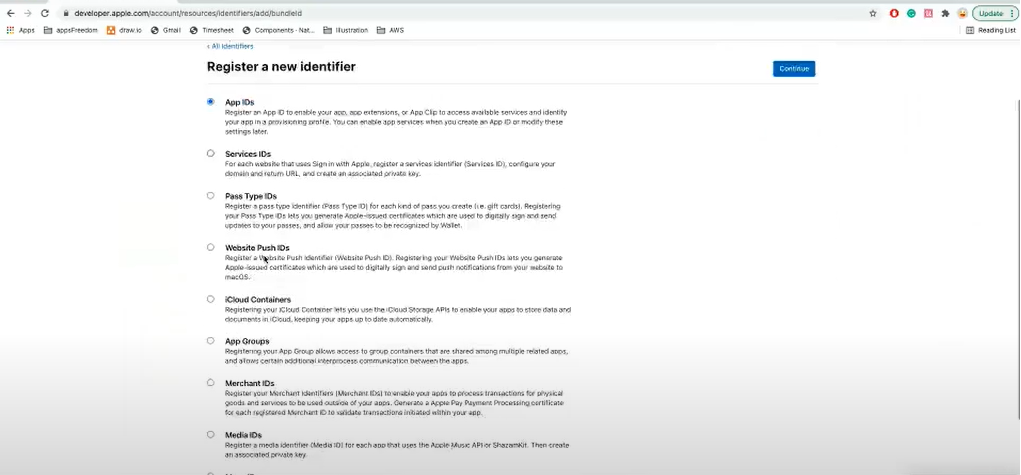
For Select a type question, choose App and click Continue.
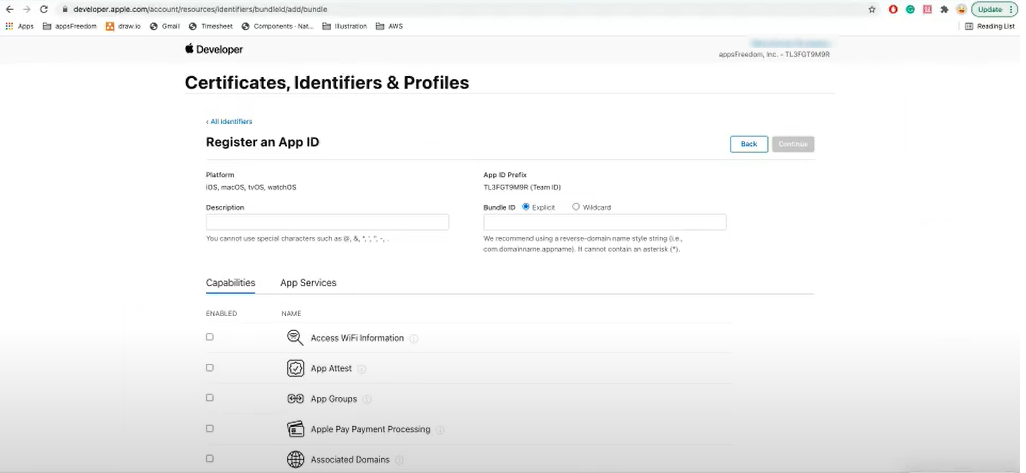
The ID registration page consists of the following details:
- Platform - where the App is deployed (all the iOS devices)
- Description - A short description of the App needs to be entered
- App ID Profile - Consists of the bundle ID given to a particular app. The general format is com.companyname.appname
- Capabilities - Multiple App capabilities are listed out. Since Pillir’s EdgeReady Apps only support push notifications, only that capability is enabled.
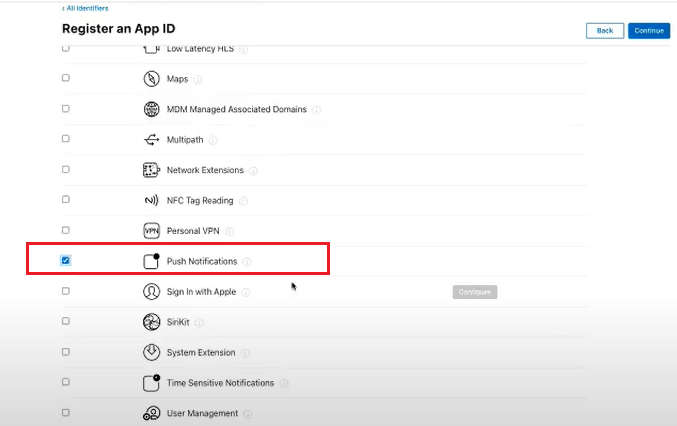
From the Capabilities section, The Push Notification option is selected. After the details are given, the user clicks Continue.
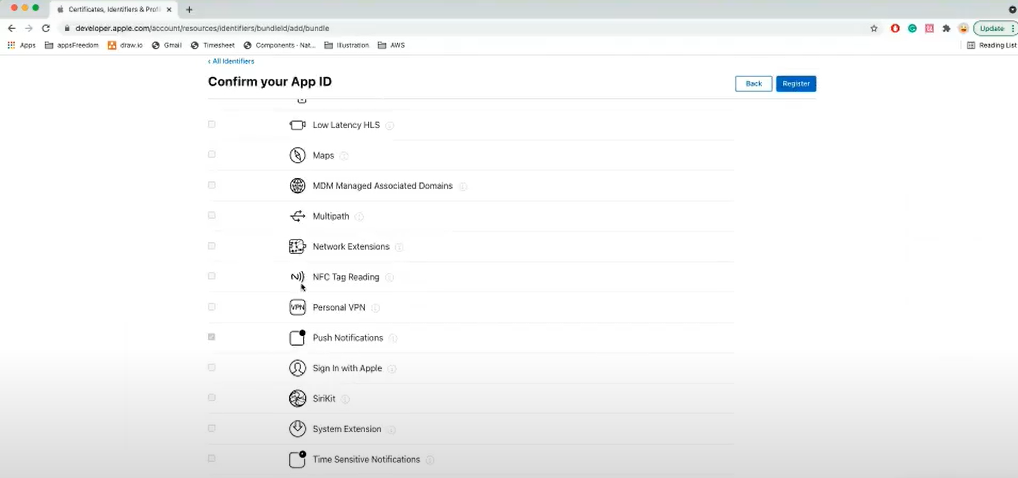
Finally, the user can verify all the entries made and click Register.
The newly created identifier is displayed on the Identifiers list.
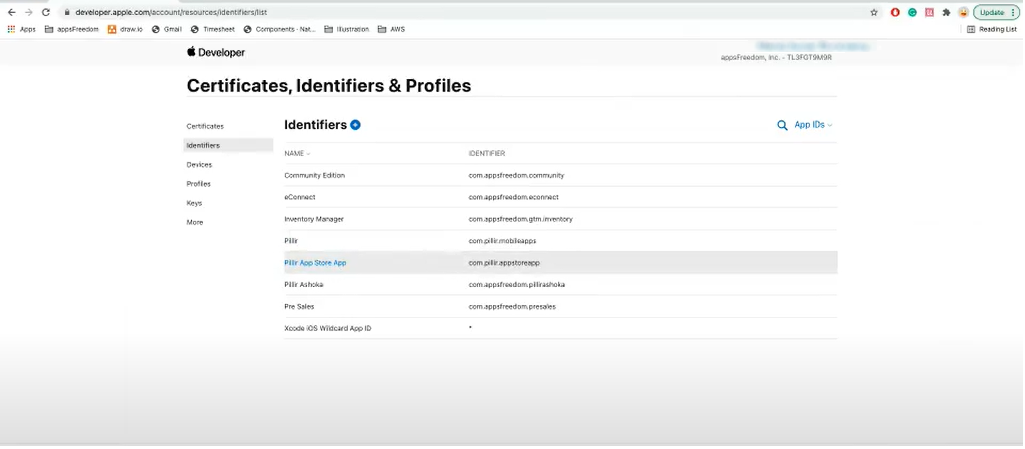
The bundle ID has to be unique. If a bundle ID with the same name exists already, it throws an error and the identifier cannot be created.
Steps to create a Production SSL certificate:
To configure a push notification for an App ID, a client SSL certificate that allows your notification server to connect to the Apple Push Notification Service is required. The SSL certificate can be generated by the following steps:
1. The push notification can be configured by clicking the newly created Identifier.
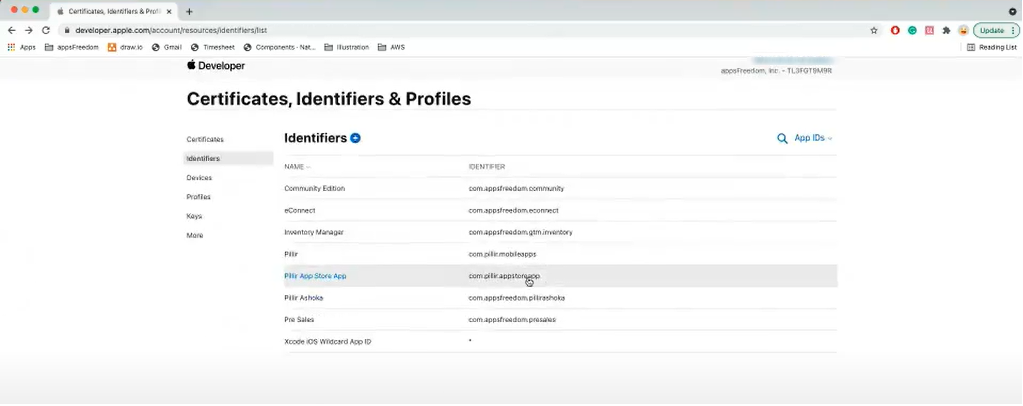
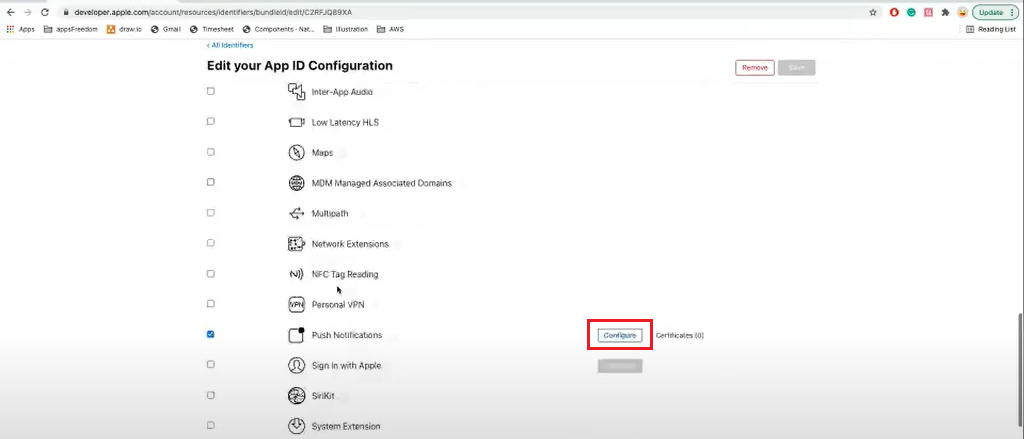
2. The user clicks the Configure button in the push notification option under the Capabilities section. (The identifier has to be edited and then configured ).
3. A popup opens requesting the Push notification service SSL Certificate for both Development and Production environments.
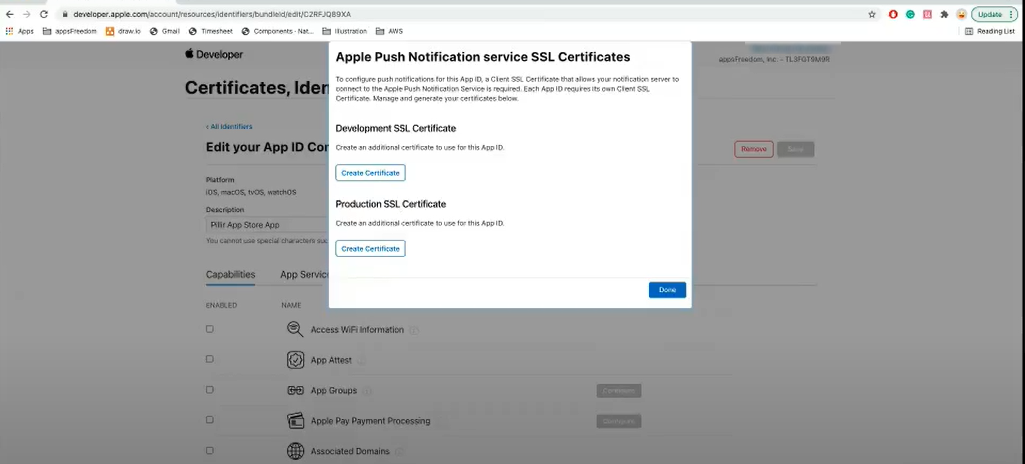
4. For deploying the application, we select the Production environment certificate. The Create a New Certificate page opens. Select the Platform as iOS and upload a Certificate Signing Request(CSR) file.
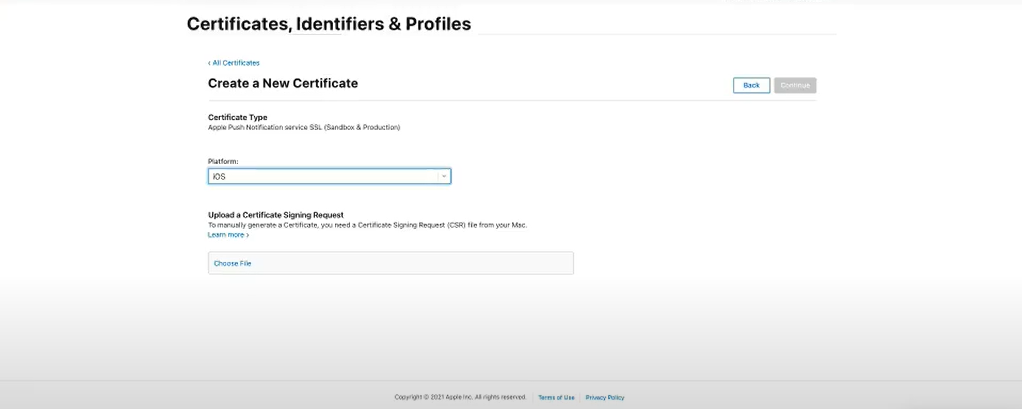
A certificate is generated using the Certificate Assistant by entering the respective credentials.
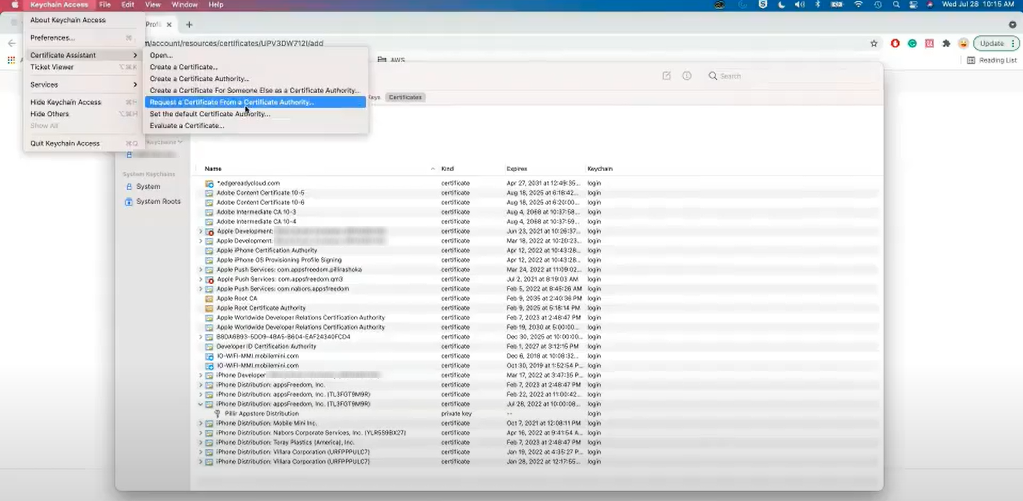
5. The certificate is exported and stored in the local file.
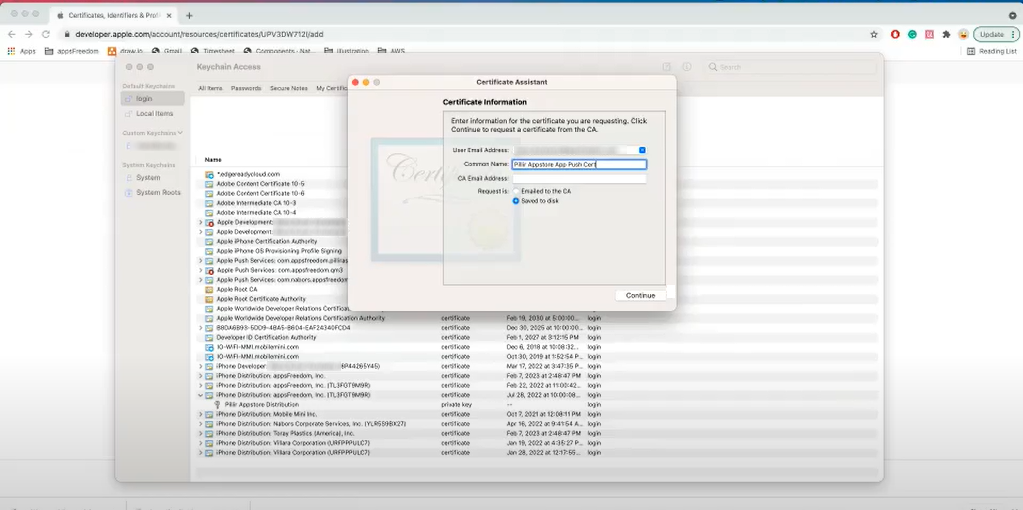
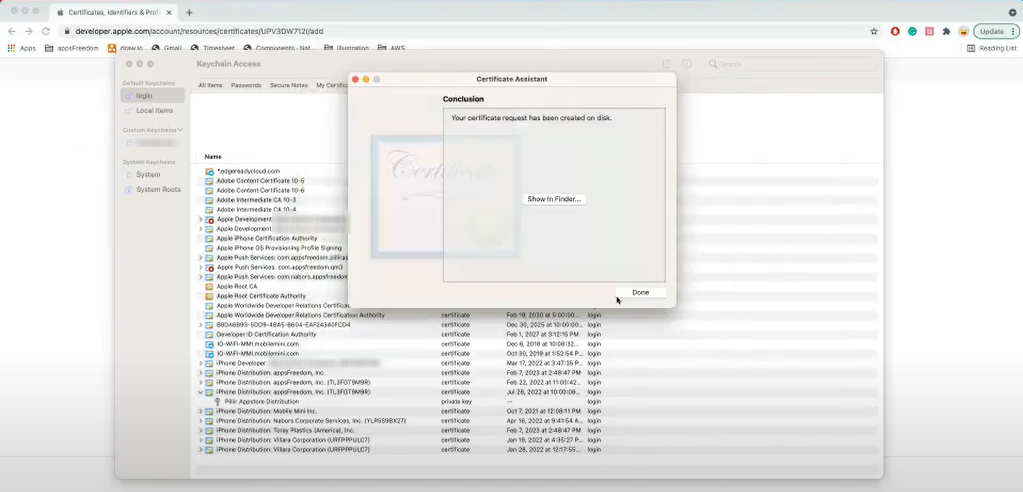
6. Production environment certificate requests the users to select the Platform and a link(Choose File) to upload the certificate.
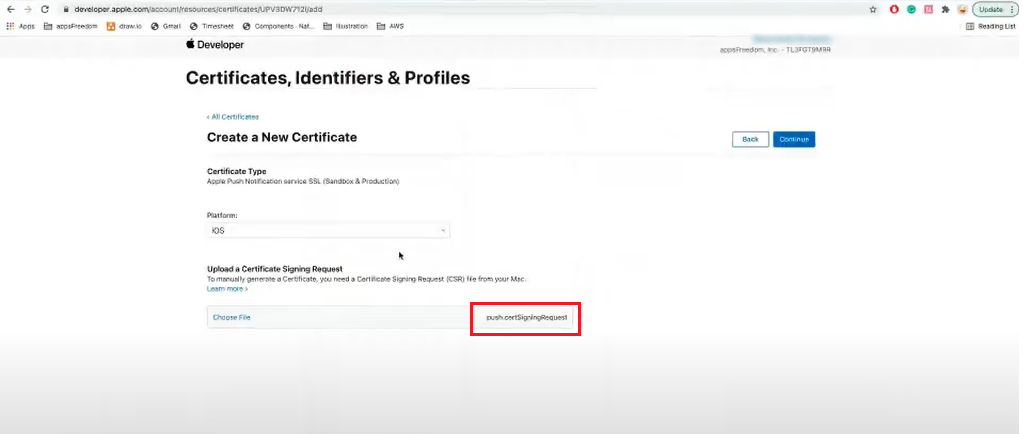
7. After uploading the certificate, the user clicks Continue. Once the certificate is uploaded, it is available for Download. The certificate can be Revoked if not required.
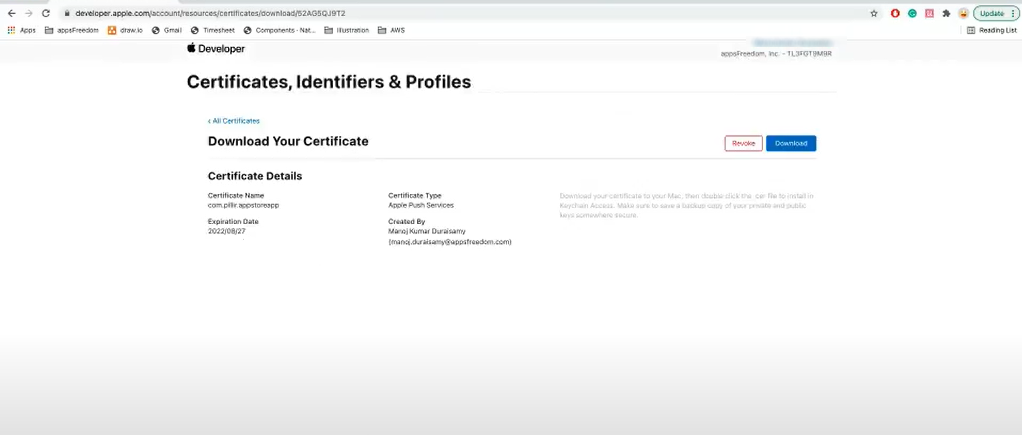
Similar to the Apple ID certificate, for the production certificate with the App identifier and Push notifications, a CSR certificate needs to be generated.
In the Keychain access, using the certificate assistant, a new CSR production certificate is generated. The generated certificate is exported in p12 for multiple user access.
Steps to create a Provisioning Profile:
1. The user has to create a Profile for the App store under the Distribution section. Once selected, the user clicks Continue.
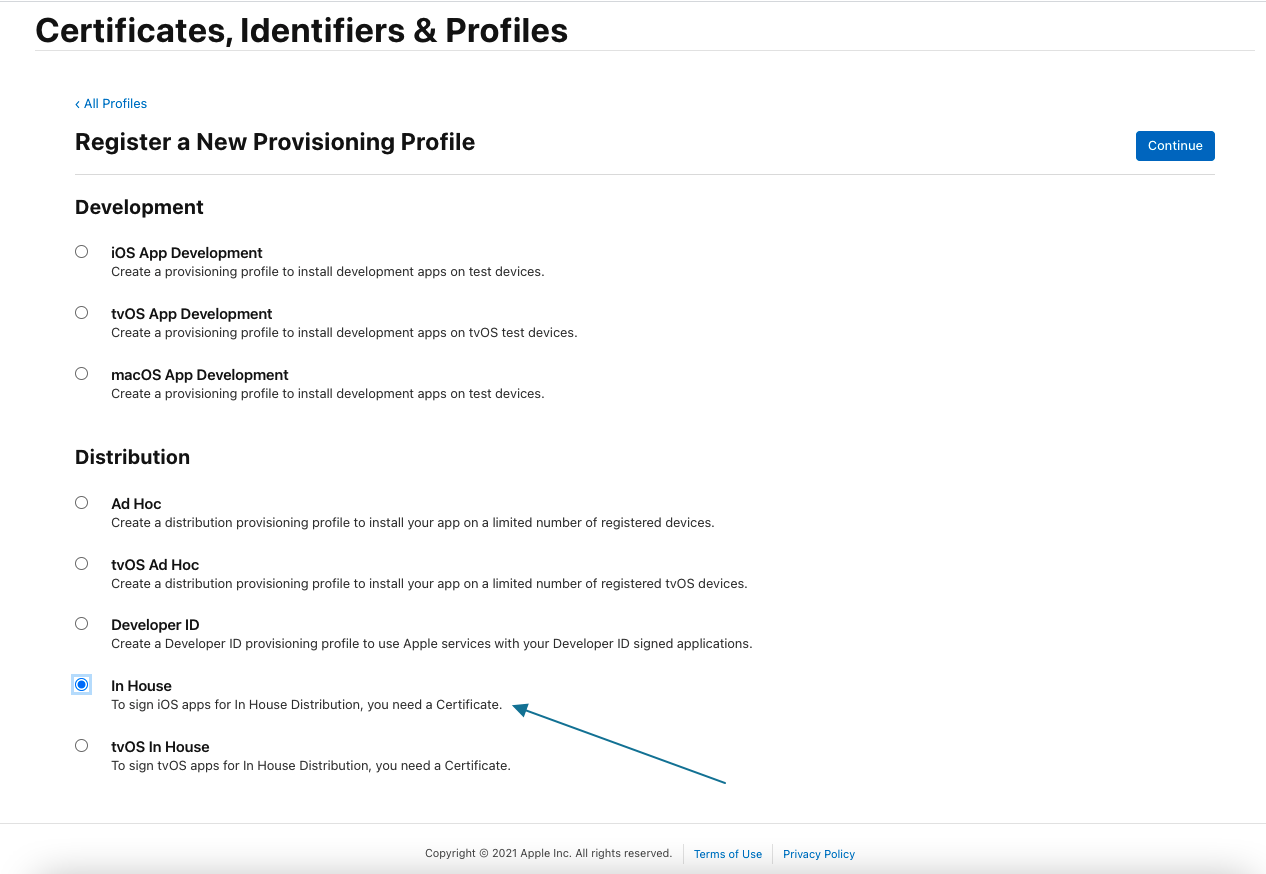
2. On clicking the Continue button, the screen is redirected to the Profiles page where the appropriate Identifier (created in the previous step) is selected from a dropdown list. Then the user clicks Continue to proceed with the next step.
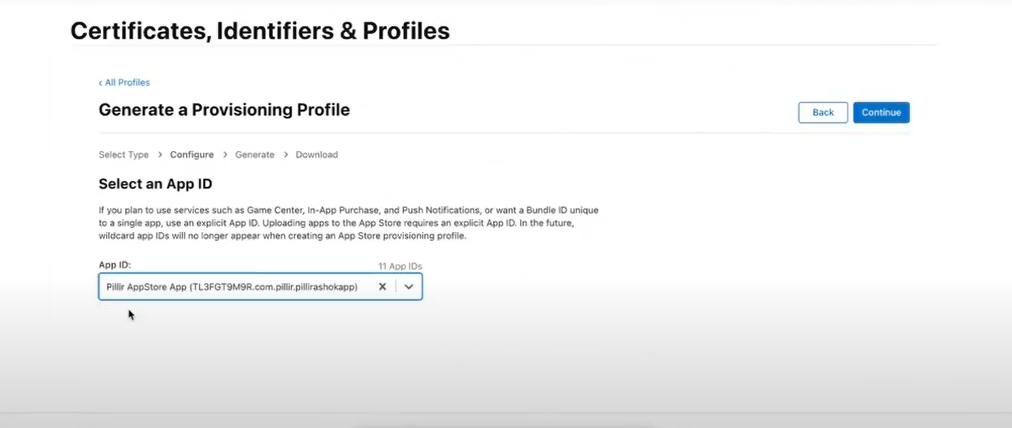
The user has to select the latest certificate generated from a list of recent certificates.
4. The provisioning profile is given a Profile Name.
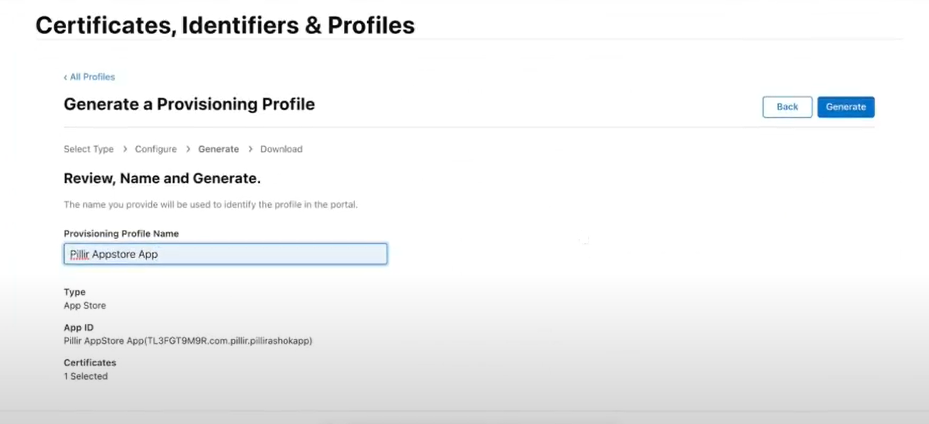
5. After all the details are furnished, Click Generate to go to the next page.
6. Click Download to get the Provisioning Profile.
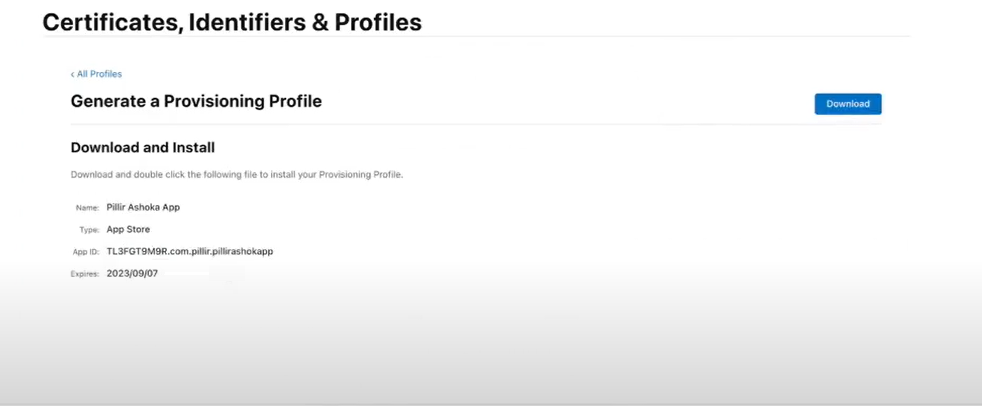
6. A newly created profile is displayed in the Profiles section.
- Multiple profiles can be created for a single App Identifier, but there cannot be multiple identifiers for a single profile.
- Since the creation of the profile does not involve any CSR certification, it can be easily downloaded, installed, and accessed on any device.