What is the Preview-Publish-Transport Phase in the EdgeReady Cloud?
An App development process follows a series of steps:
- Creating the Business Process and Business Functions
- Modeling the flow in the App Process Modeler
- Creating the UI Screens in the App Designer
- Adding Behavior for each component and screens in the App Behavior Section
- Calling the BOS for each screen from the Integration Builder.
The Preview/Publish/Transport section is accessed once all the stages of App Development are complete. The icons are seen on the top right of the App Process Modeler canvas.
Why do we need the Preview/Publish/Transport Section?
In the EdgeReady Platform:
- Preview demonstrates a ‘Live’ app based on the ‘Deployment Settings’ (e.g. display in Browser or Device).
- Publish helps to publish the App.
- Transport helps to transfer the App to the subsequent Environment (e.g. Development to Quality or Quality to Production).
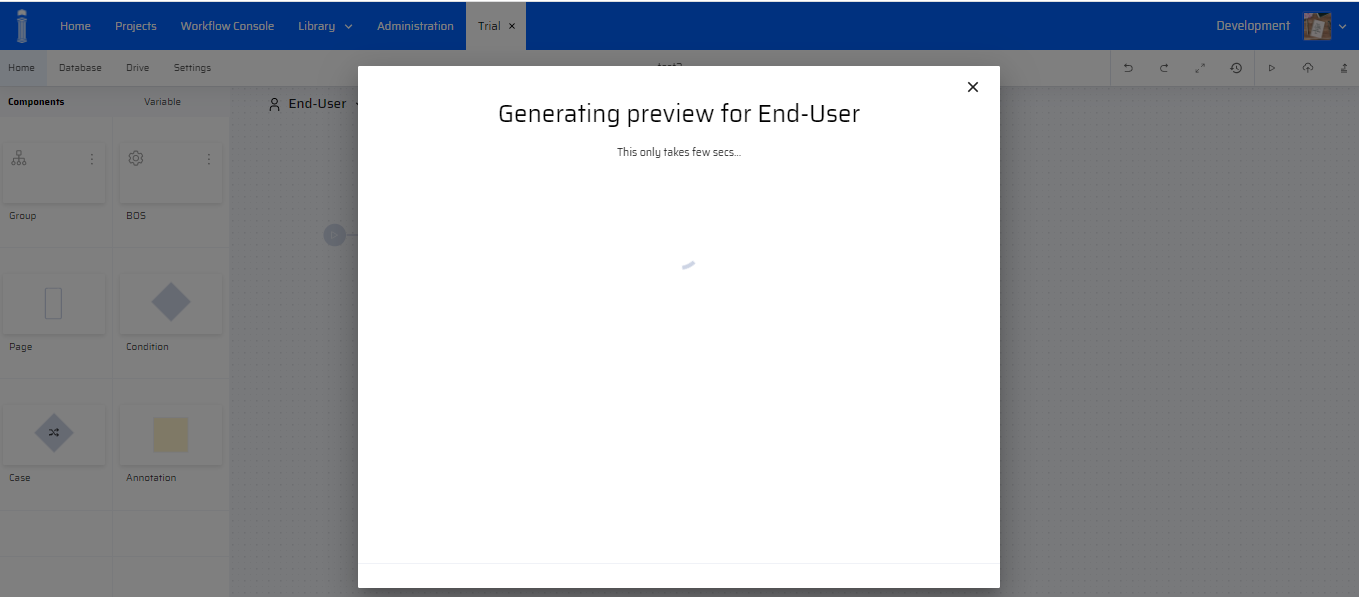
How to do an App Preview?
If Preview is clicked, the following screen popup appears: The deployment platform and preview mode is chosen.

In the current version, the Preview/Publish/Transport option is available for Hybrid Apps only.
On clicking Next, an intermediate screen appears.
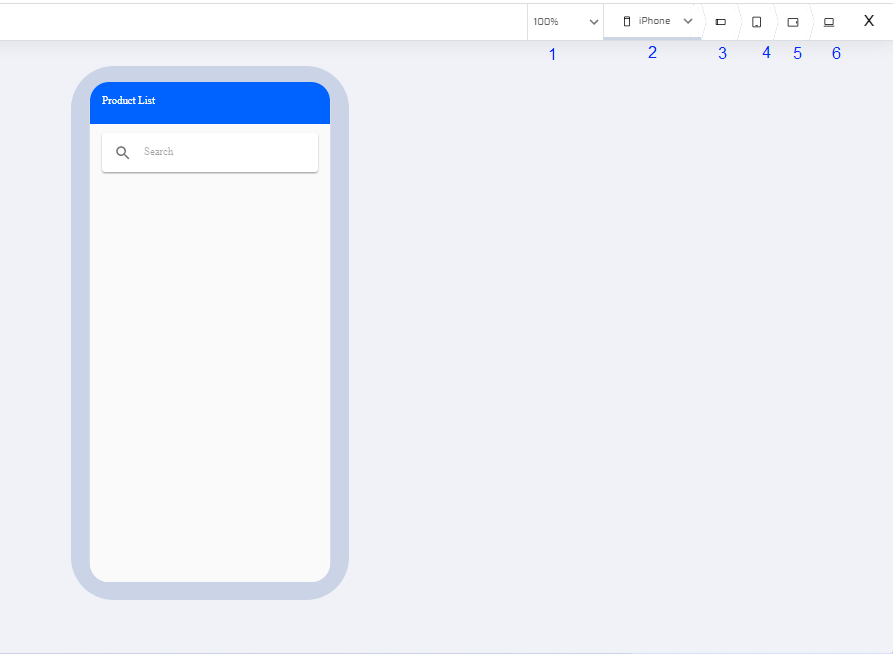
The preview of the app screen is displayed. The following preview options are available:
- Zoom - 50% - 150%
- iPhone or Android Vertical preview mode
- iPhone or Android Horizontal preview mode
- iPad or Windows or Tablet Vertical preview mode
- iPad or Windows or Tablet Horizontal preview mode
- Web preview mode
Preview in a Workflow App
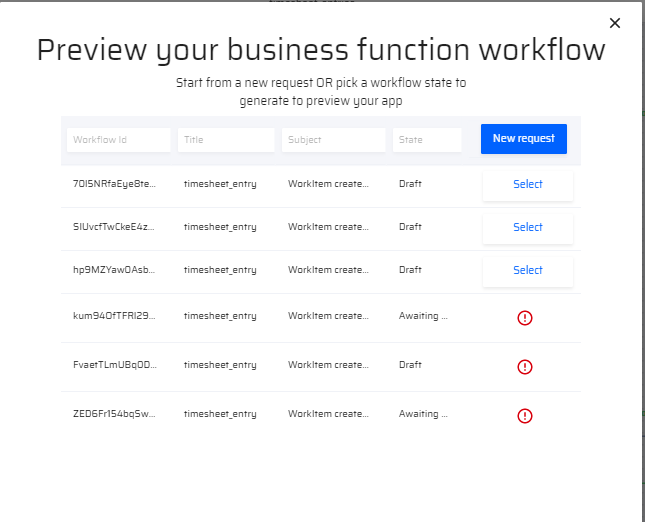
In a workflow app, after the 'Generating Preview' popup window, the 'Preview your business function workflow' popup window appears. This window displays a list of all the workitems created in the app. The workitems can be in any state or assigned to any user role. The user can do one of the following actions:
- Click New Request to create a new workitem in preview mode
- Click Select to view/edit an existing workitem in preview mode.
If a new workitem is created it is added to the list of workitems in 'draft' state; If an existing workitem is edited, the state of the workitem changes accordingly.
The user can view the error message of workitems with the error icon and rectify it accordingly. Errored workitems cannot be previewed.
How to Publish the App?
Once the App screens and settings are previewed and verified, it is ready to be published. The user clicks the Publish button to publish the App. The following popup appears.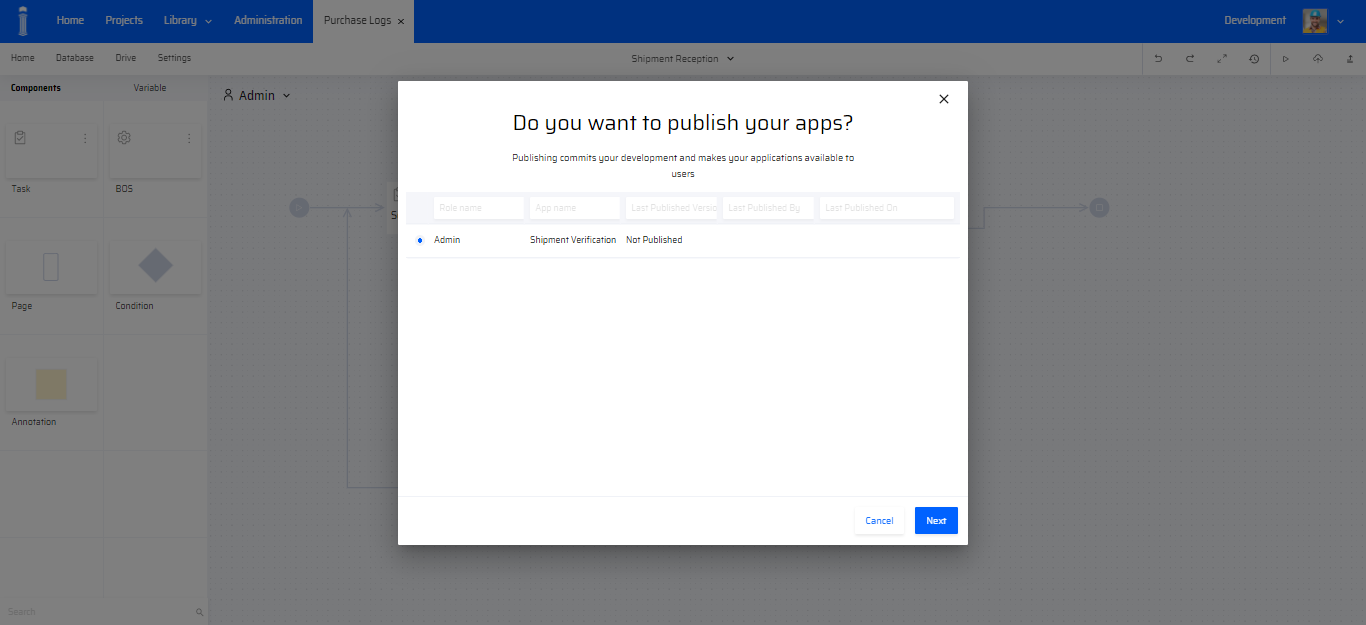
The user selects Next. The next popup requests for details of the App. The Version Number for the publish has to be specified along with the Comments. This enables the same App to be published multiple times.
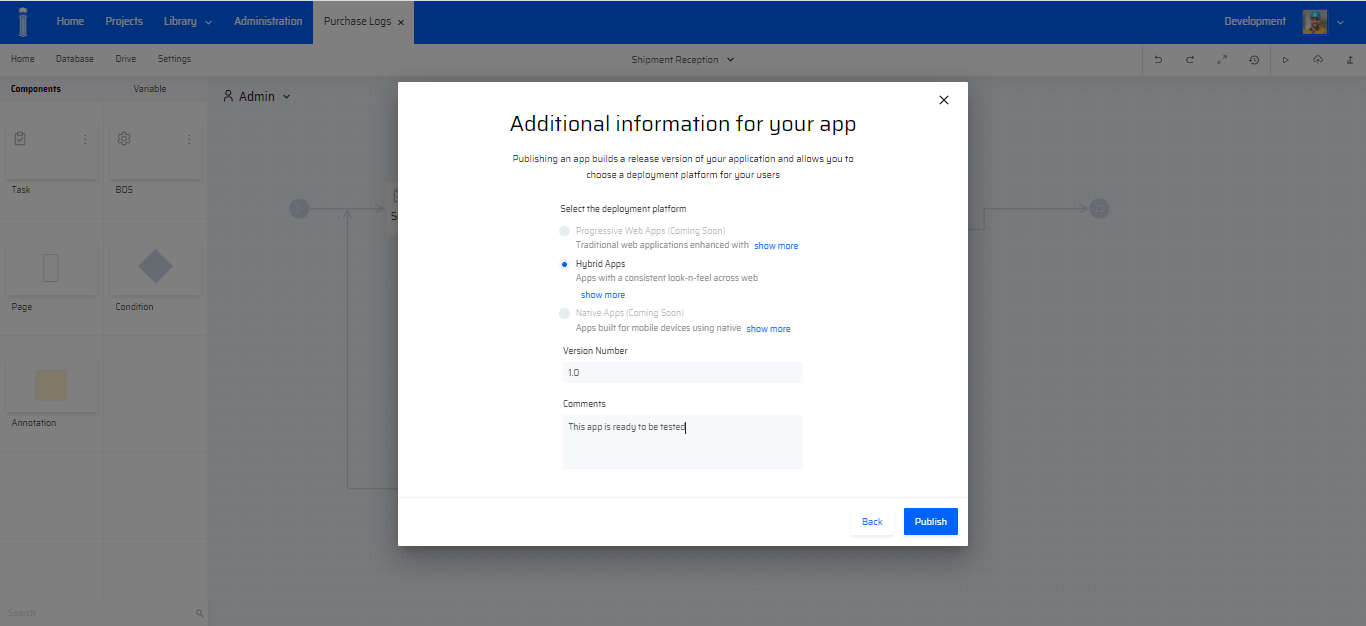
After all the fields are entered, the user clicks Publish. The progress is displayed in the next two popup screens.
| During Publishing | Publishing Complete |
|---|---|
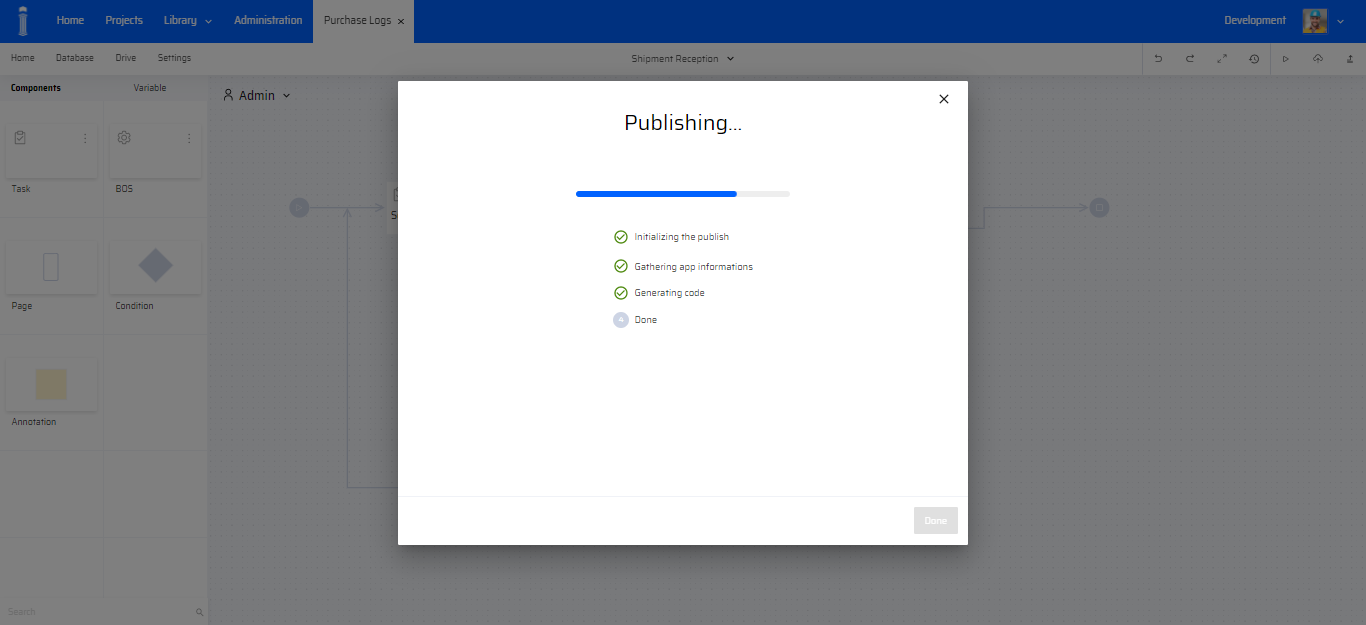 | 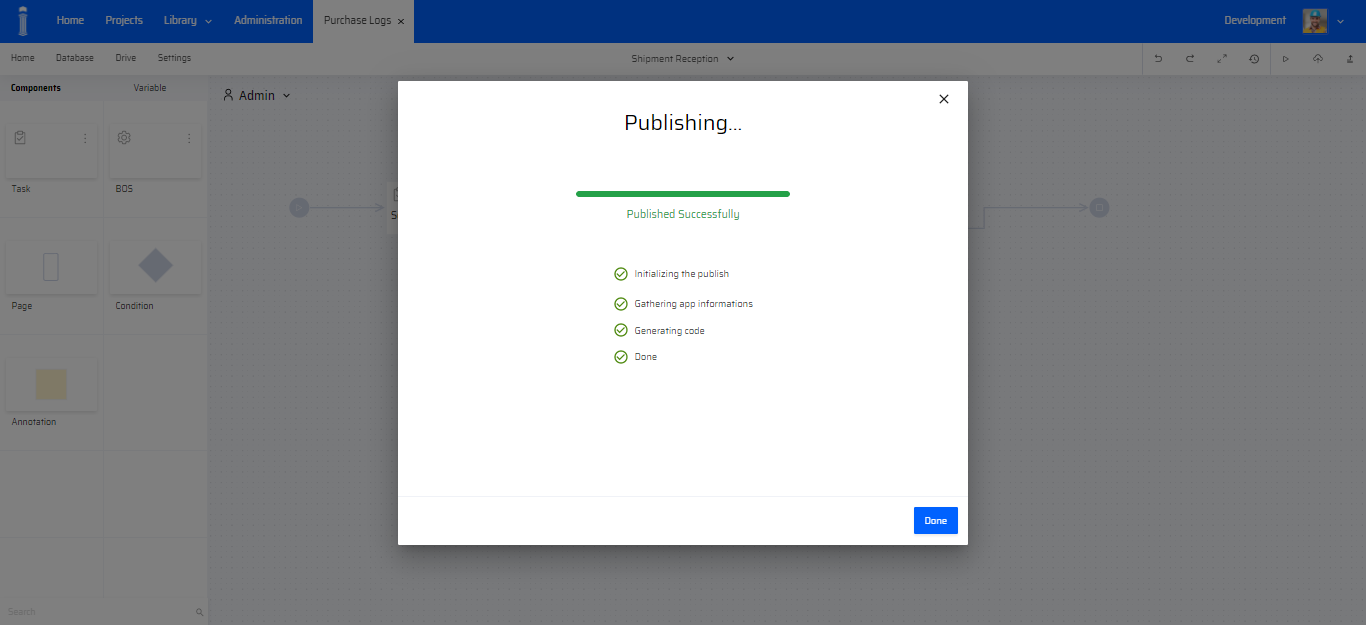 |
Once the App is successfully published, the final popup is displayed with instructions to download and access the App.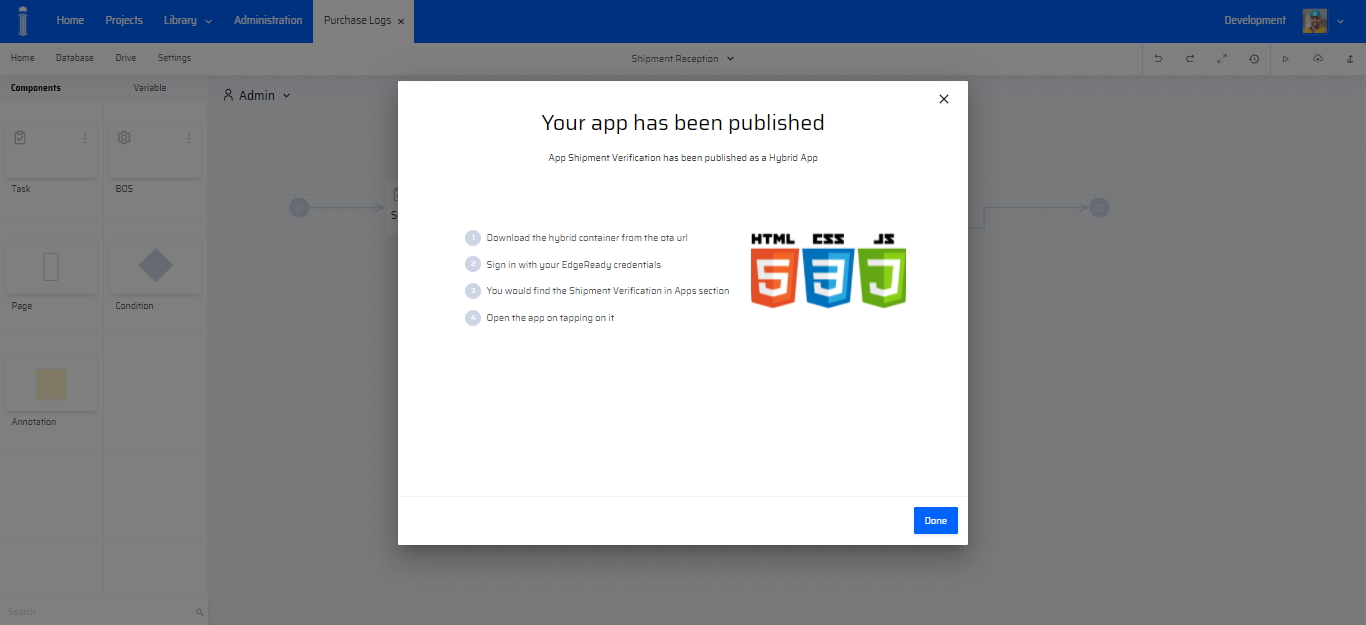
How to Transport the App?
Once the App is previewed and published, it undergoes two stages where the App is Transported from the Development environment.
- The App is transported to Quality for testing.
- The App is transported from Quality to Production for deployment and rollout.
To transport the app, the user clicks the Transport icon. The following popup appears.
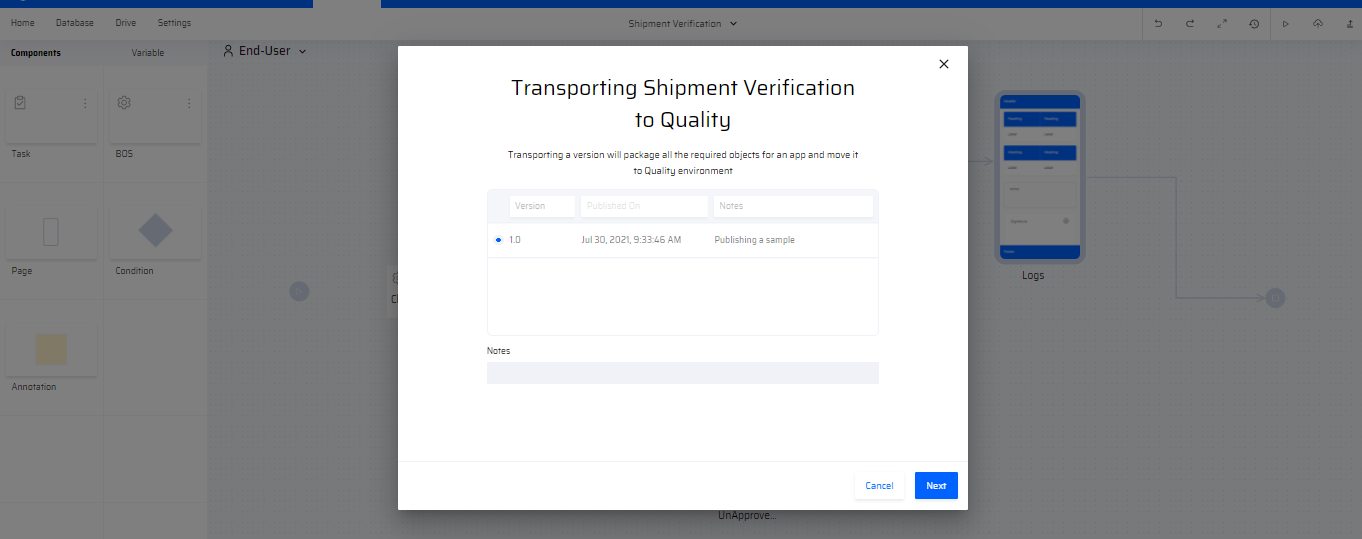
Clicking the Transport button moves the App with the user-selected version to the Quality environment. The following items of an App are transported in the backend:
- DB structures
- BOS objects
- Integrated systems
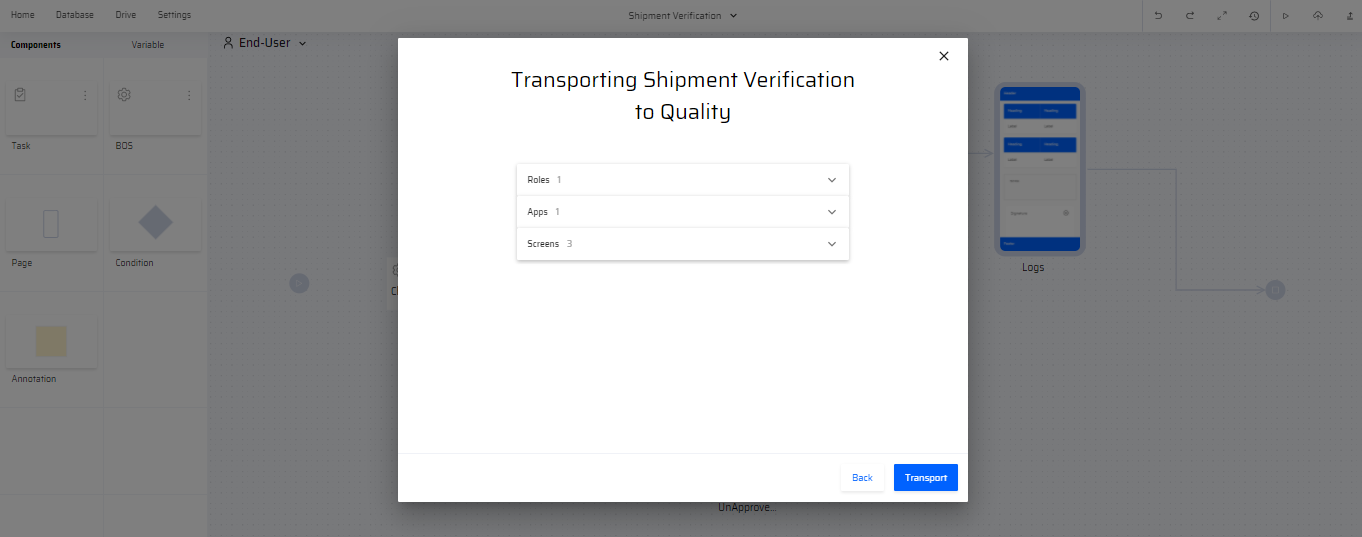
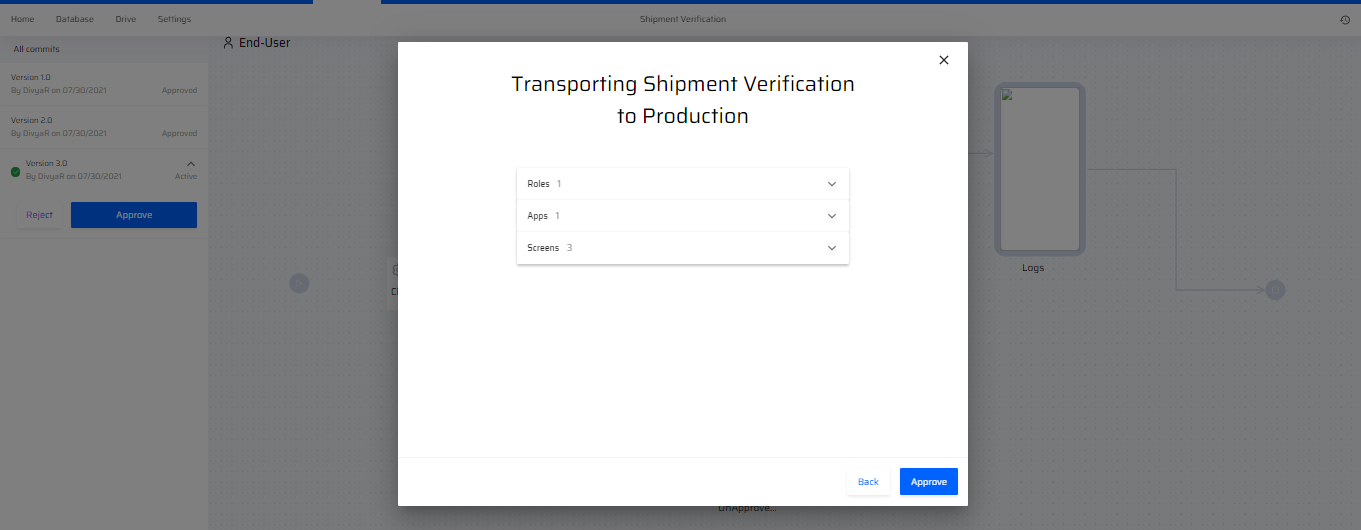
In the next popup, the respective Roles, Apps, Plugins, Systems, Tables, Screens, Services, Icons, Images, Assets are checked.
Once it is transferred, the following popup appears.

After successful transport, users can log in to the Quality Environment with their credentials and check the new App in the selected version.
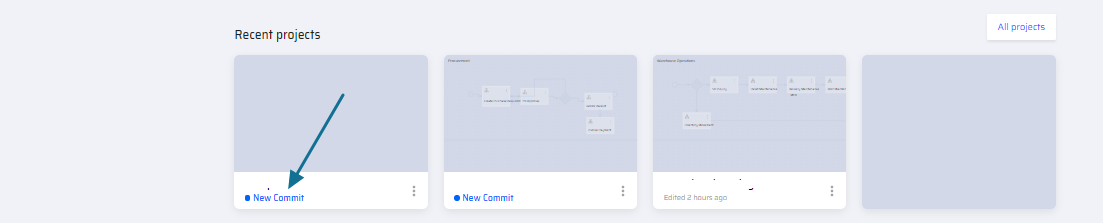
Quality Landscape
In the quality environment, the new projects that have been transferred appear on the dashboard with a "New Commit" highlight.
Users can select the Projects and redirect to the App Process Modeler section where they can be Approved/Rejected by the Admin.
The following screen depicts how the transported Project appears on the App Modeler canvas. The Admin can Accept or Reject a Project after verification. In the below example, different versions of the same project are approved and listed.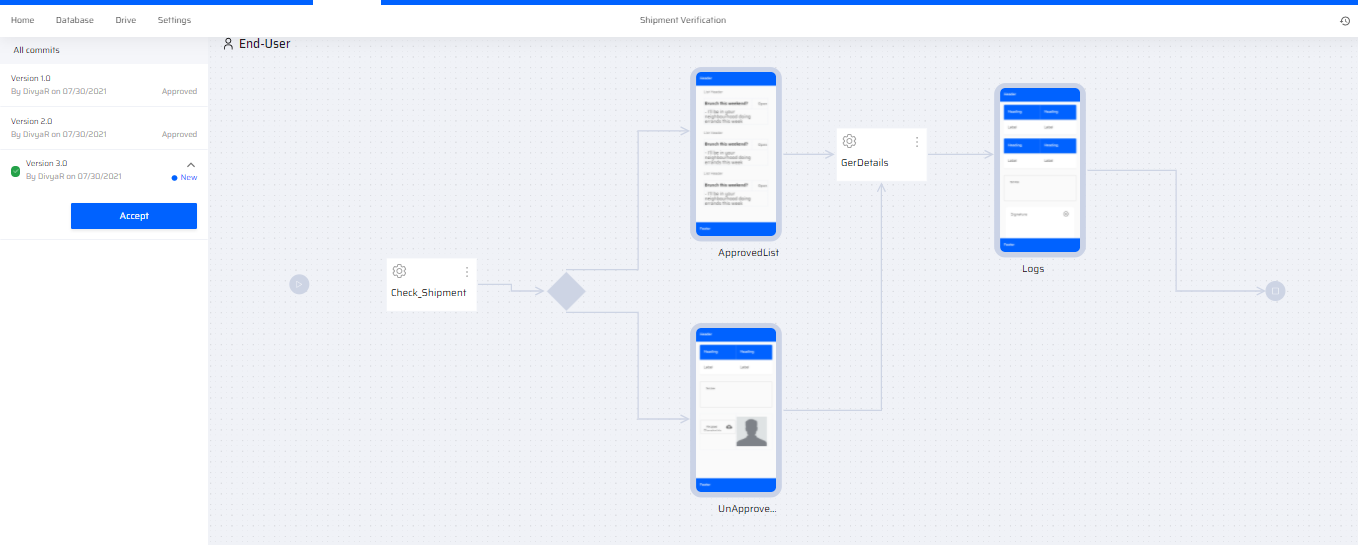
Accepting the Transport follows the steps:
The version with comments are entered.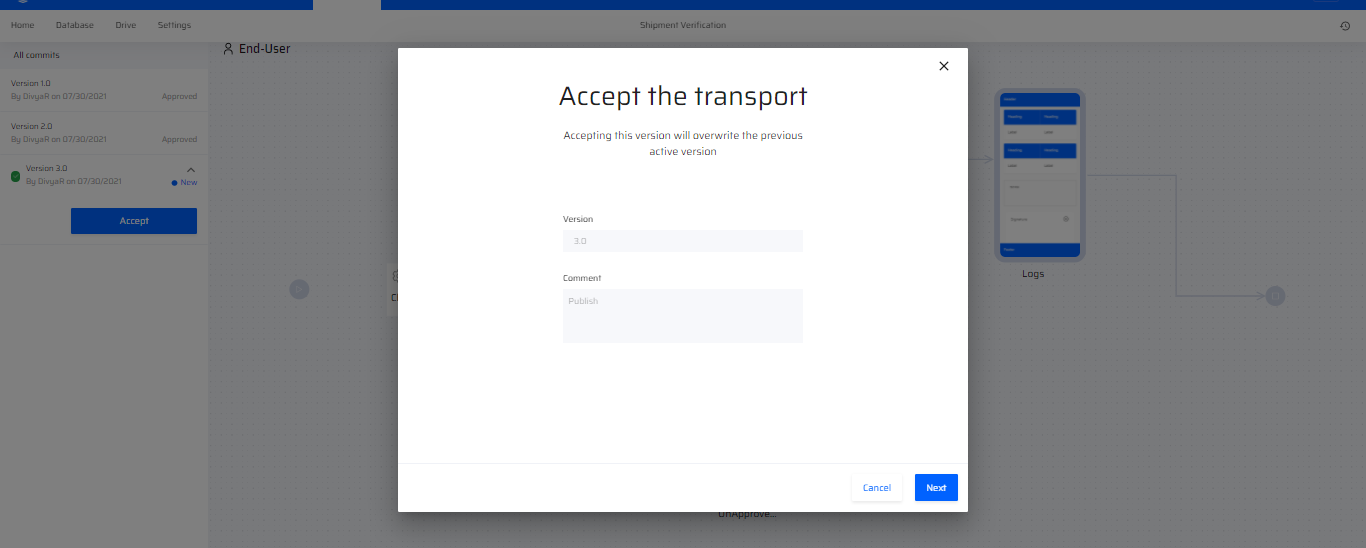
In the next popup, the app elements are checked and verified. Once checked, the user clicks Accept. Accepting the Project enables the transfer Process.
| Transport Progress | Transport Complete |
|---|---|
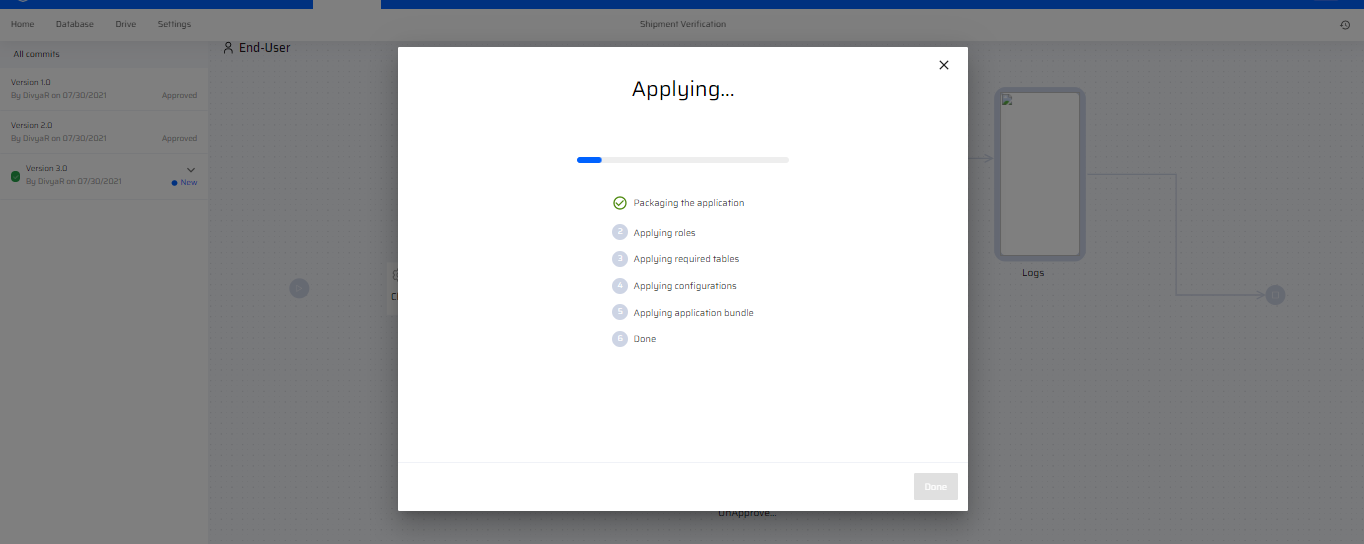 | 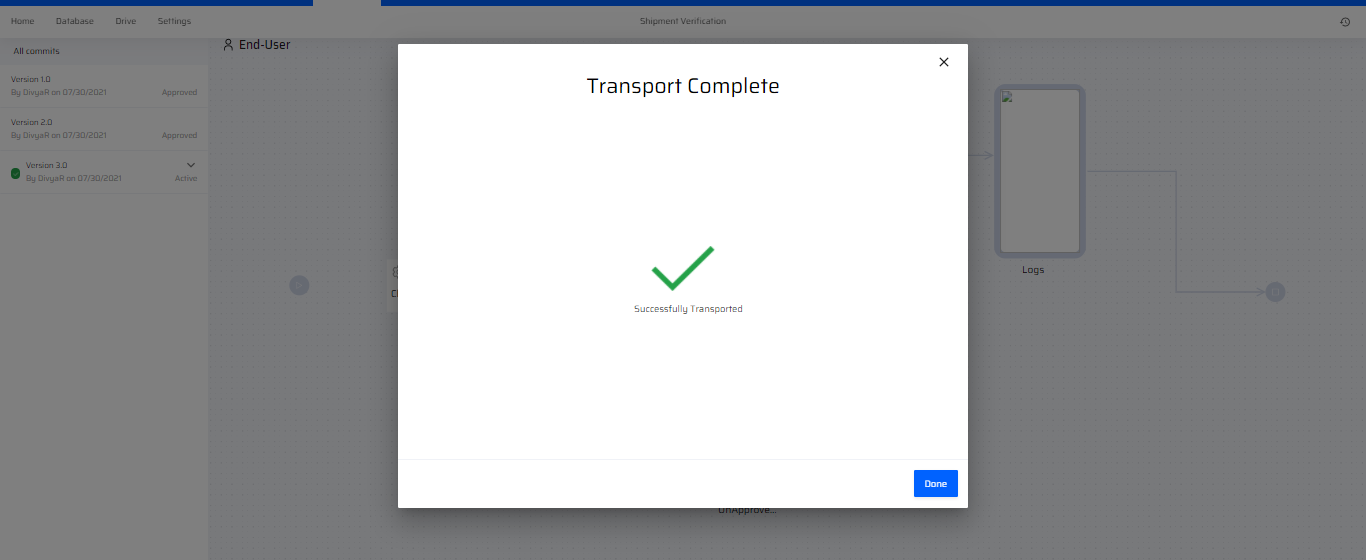 |
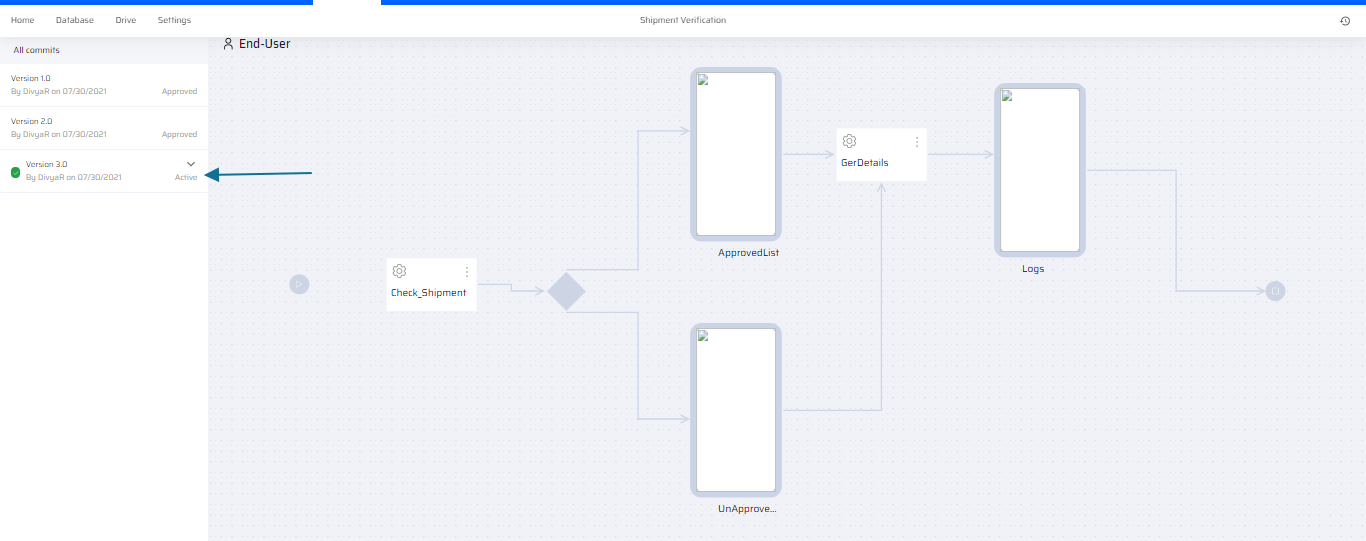
Once the Project is successfully transferred, it is listed along with the previously accepted Projects on the left. Users must note that the current version of the project became the Active version.
Production Landscape
The active Project can be Approved or Rejected. Only Approved Projects can be transported to the Production Environment.
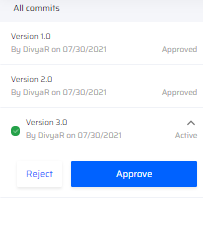
Once the user clicks the Approve button, the following popup appears.
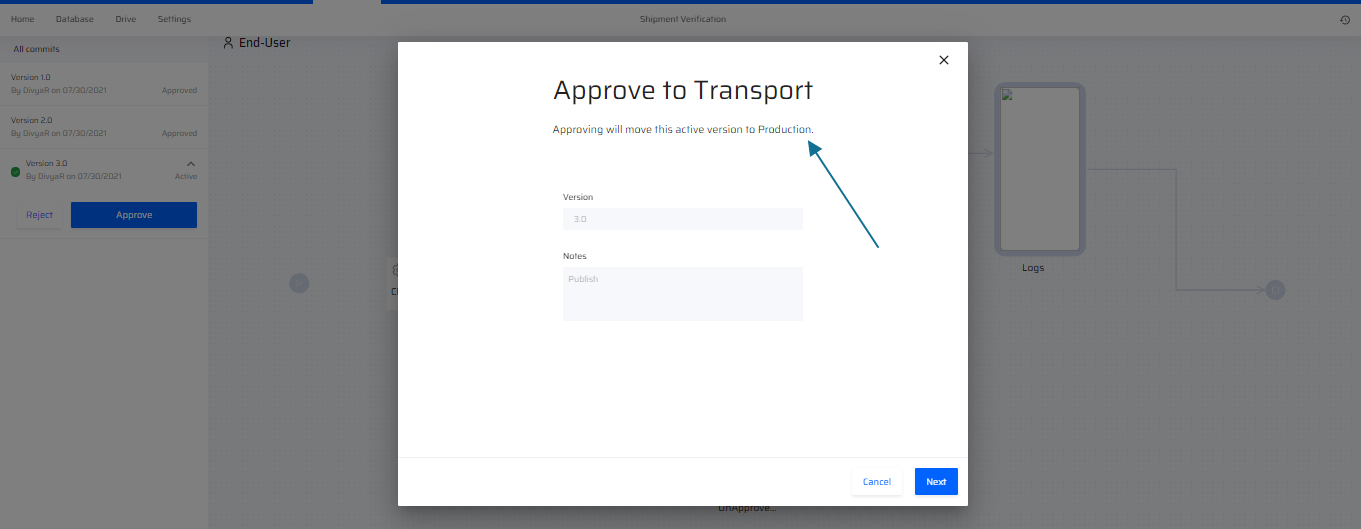
By specifying the version number and comments, the user can Transport the Active App to Production. This step follows another approval process where the App elements are verified once again.
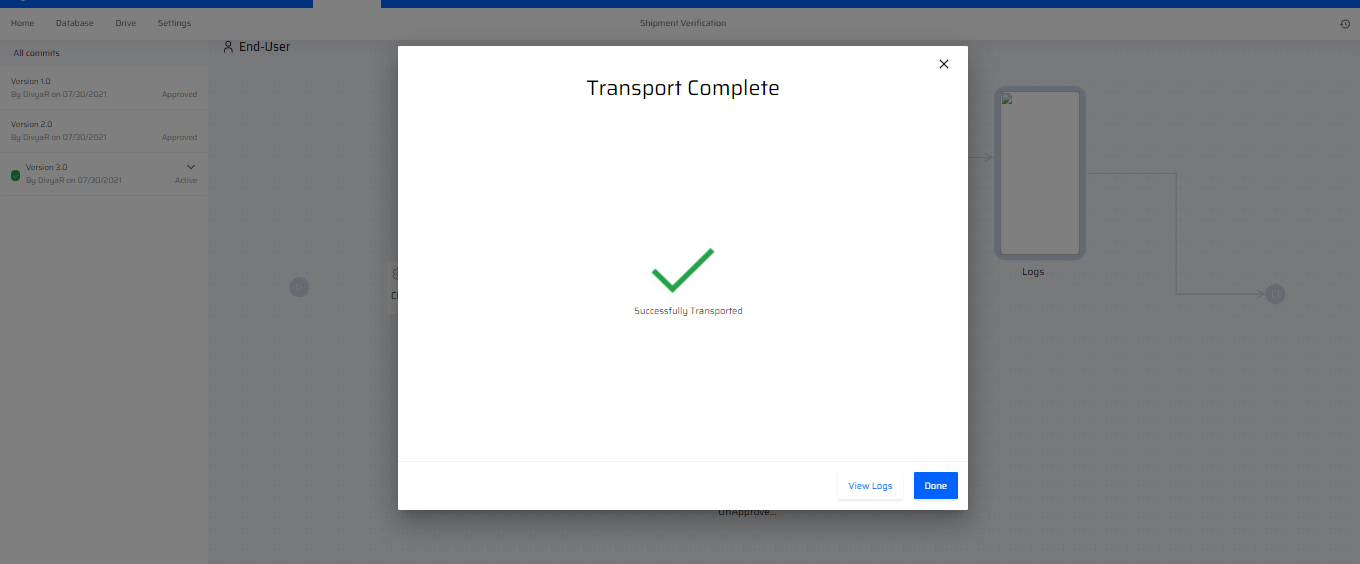
Once Approved, the Project is transferred to Prod and displayed in the list of Approved Projects on the left.
On verification, if the Project does not meet the required standards, the user can click Reject. This process is displayed in the popups below.
| Rejection Progress | Rejection Complete |
|---|---|
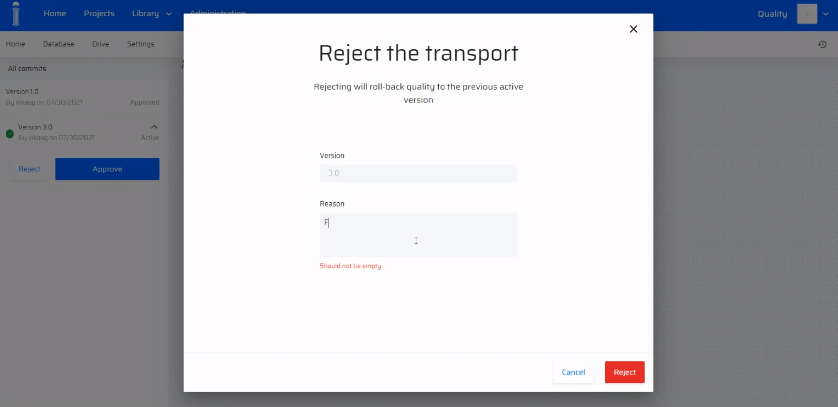 | 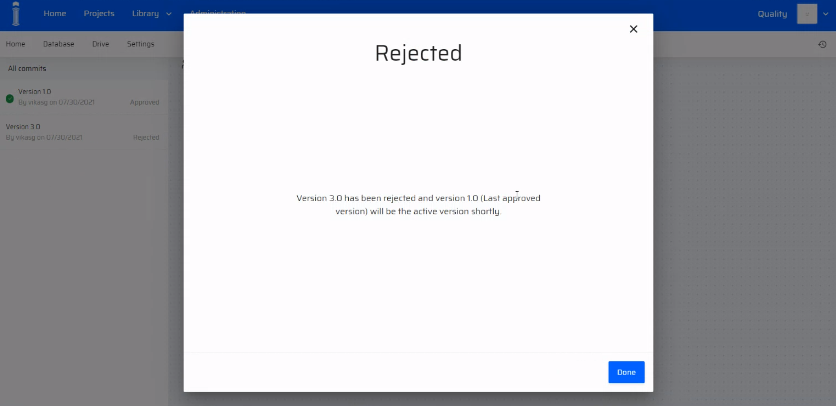 |
If a particular version is Rejected, the previous version becomes the active version by default.