A workflow application enables a user to build business functions that involves more than one user role, to perform a set of actions in a sequence, and to achieve the movement of a workitem to different levels between start and finish.
In workflow apps, the developer connects a set of APM components in different lanes in a sequence. Each lane is assigned a user role who performs a set of actions or business logic that act on the workitem in order to move it to the next level (lane) based on the usecase.
For example, if you want to create a workflow app for employees to raise a leave request, it would include actions like:
- Submitting a leave request by an employee (User Role 1)
- Approving the leave request by a manager (User Role 2)
When a business function involves more than one user role to perform a set of actions, a Workflow App is created.
Creating a Workflow App
- To create a workflow app, refer the Steps in Creating Business Functions section in Business Functions and Roles.
- Once you open, the canvas appears as below:
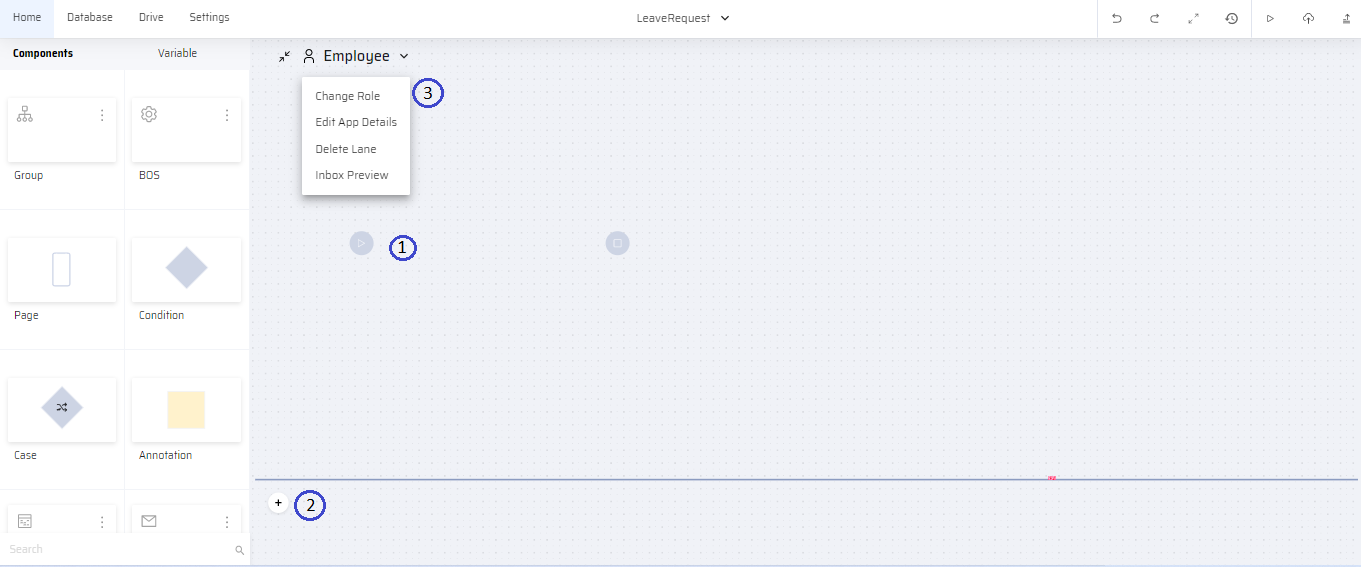
- The Start - Finish icons appear on lane 1. It signifies the beginning and end of a workflow. The icons can be dragged and dropped in any lane if no arrows are connected to it.
- Click the + icon to add a user role and App name in lane 2. If required, multiple lanes can be added subsequently.
- The following options are available in user role drop-down list:
- ChangeRole - Change to a different role that can access the business function defined in the respective lane
- Edit App Details - Edit App details such as App name, online or offline App, App menu, App icon
- Delete Lane - Delete the lane
- Inbox Preview - To customize or configure how the workitems appear in the user's inbox
- Workitem Filter - To show workitems based on a filter condition. If a filter is added, it is depicted on the canvas with a filter icon.
![]()
Now the user can drag and drop the different APM components in each lane according to the required business logic. Each lane demarcates the set of actions performed by a specific user role.
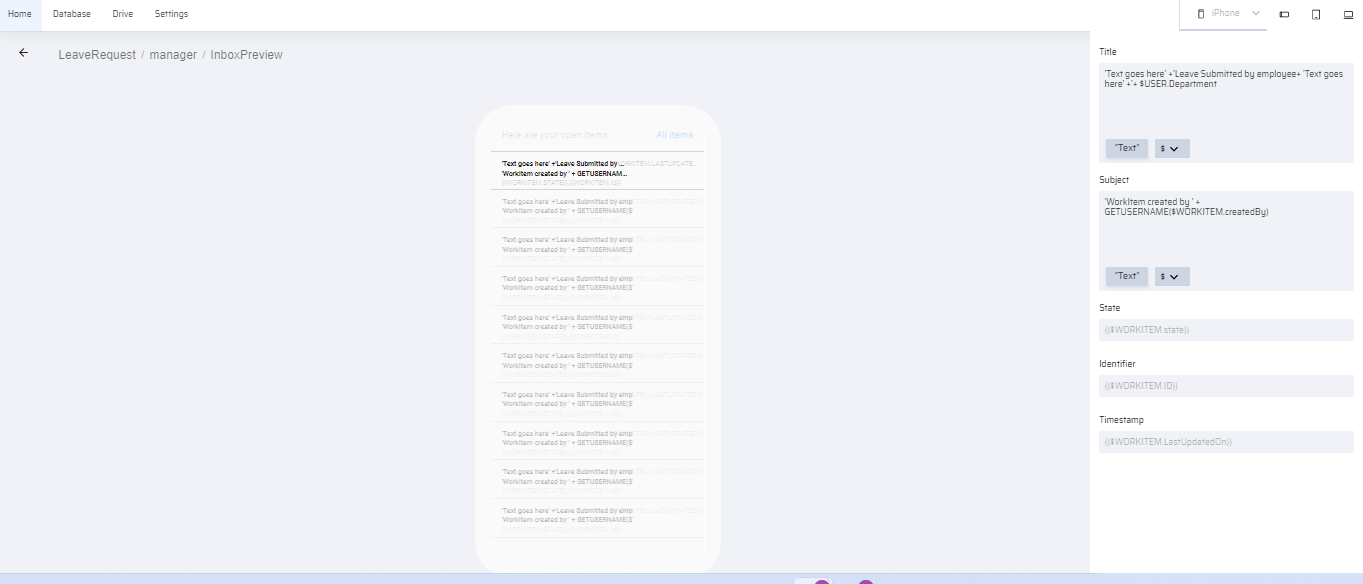
Inbox Preview
In Inbox Preview, the user can configure or customize the information that is displayed in the workitem log through variables. On clicking the Inbox Preview, the user can edit or configure the following information:
- Title - Workitem name. Can be edited by clicking "Text". The user can add more information through the following properties:
| Property | Image |
|---|---|
| 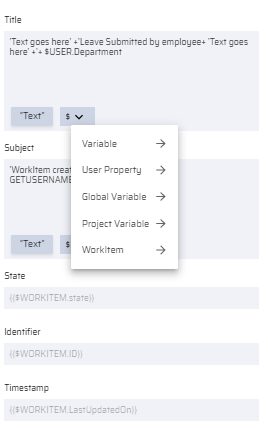 |
- Subject - Brief information about the workitem. Additional information can be added through properties.
- State - Workitem State (Non-editable)
- Identifier - Workitem ID (Non-editable)
- Timestamp (Non-editable)
APM Components in a Workflow
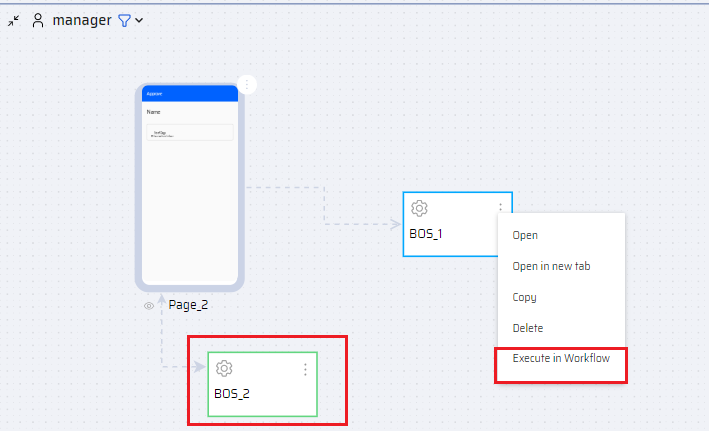
- All components except Group and Page can be executed as a workflow component. It is done by clicking the ellipses menu and selecting Execute in Workflow. The workflow components have a green outline.
- If the app component is green it means that the operation is processed in the server. If not (non-workflow) it is processed in the application itself.
- While transitioning from one lane to another, the user can connect only a workflow component with another component in a different lane. On connecting, the user is prompted to define the state of the workitem. The default states are 'Draft' and 'Completed'. A new state can be added by clicking 'New Sate'.
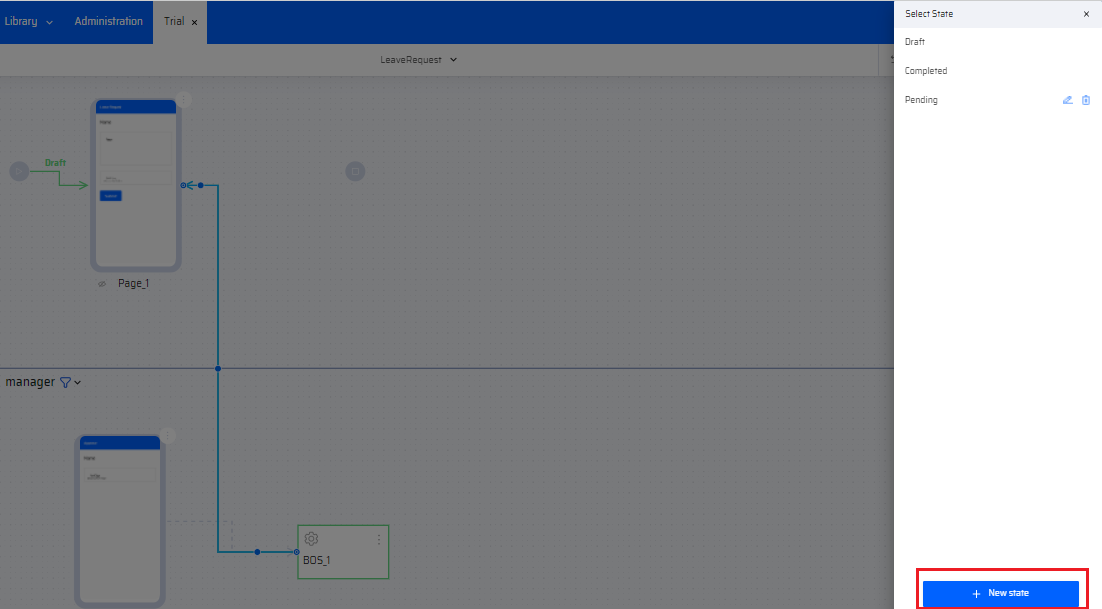
These states are reflected in the Workflow Console tab where the workitem log is displayed.
Navigational Arrows in a Workflow
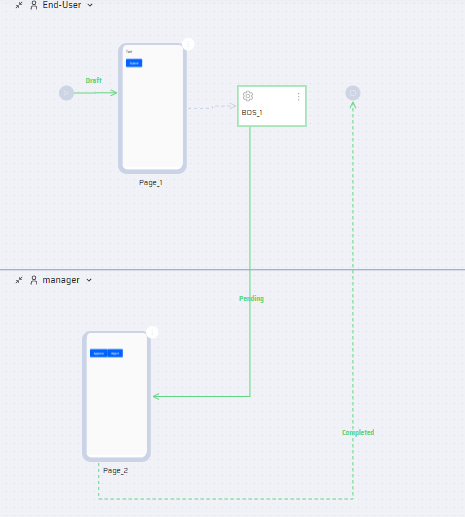
- The navigational arrows appear green when they connect app components between two lanes. It denotes the particular state of an action. Right click the arrow to do the following:
- Delete Connection - Delete the connection
- Add State - State of the workitem
- Reset Line -Re-positioning the arrow

By default, the arrow from Start and the arrow to Exit are in Draft and Completed states respectively. You can however change the state name.
- If the arrows appear in dotted lines between components, it denotes that an Interaction is not yet added to the component.
- When connecting app components between lanes, the user must change the component to Execute in Workflow mode. The component appears green after it's changed.
Workflow Console
A workflow manager is able to view all work items at different states from the workflow console tab.
If there is any error in the workflow events, the workflow manager can perform the following corrective actions:
Archive - Archives an errored workitem from Workflow Console. However the workitem is preserved.
ShowHistory - Displays a detailed log of the workitem
Retry -To retry an errored workitem from the current state. The Admin performs a retry that is directly executed in a workflow engine on click of a button.
Revert - Restarts the execution from the previous success state
Restart - Restarts the execution from the initial state