The Users Management screen enables the tenant-admin to manage Users, Roles and User Settings.
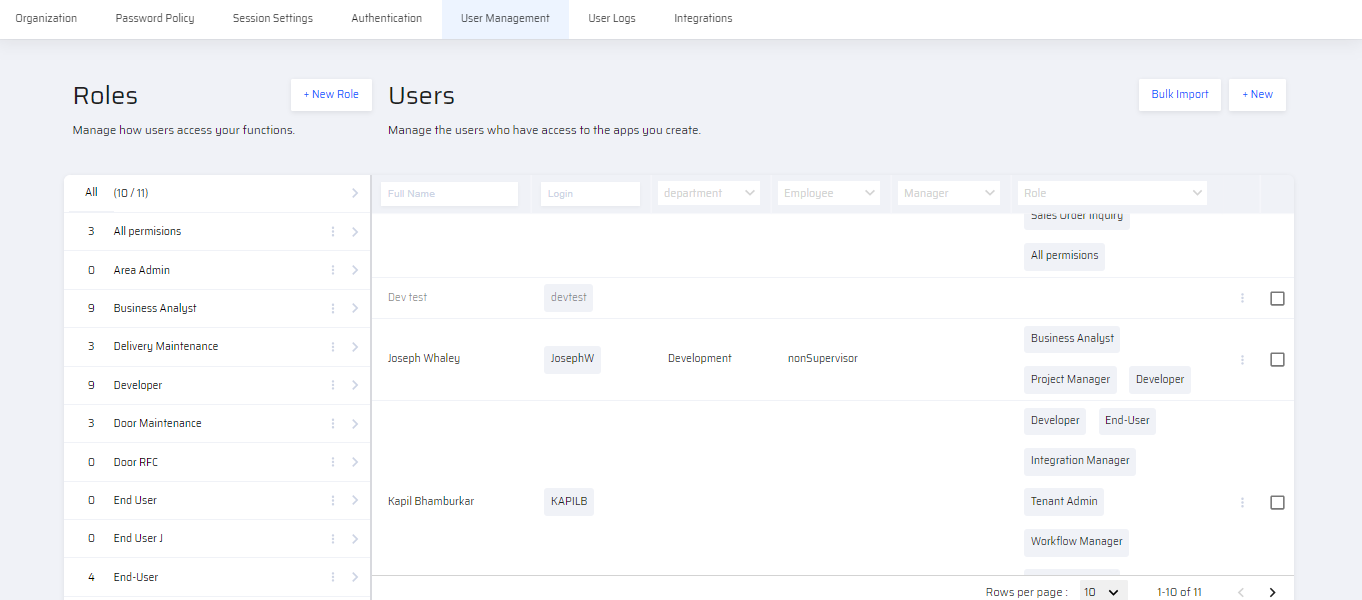
Roles
A list of existing Roles are displayed on the left. On clicking the 3 vertical dots (ellipsis menu) on the right of each role, the following options are available:
- Edit
- Delete
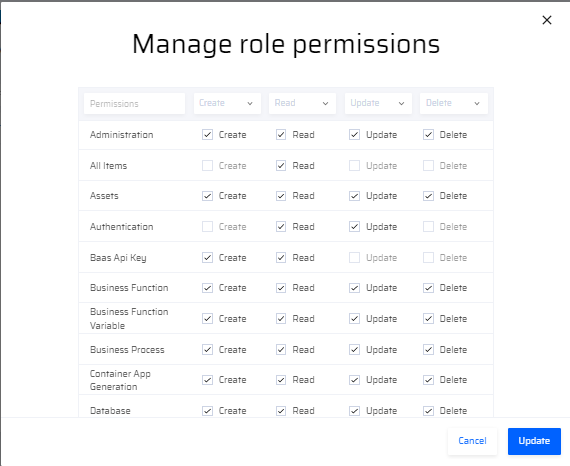
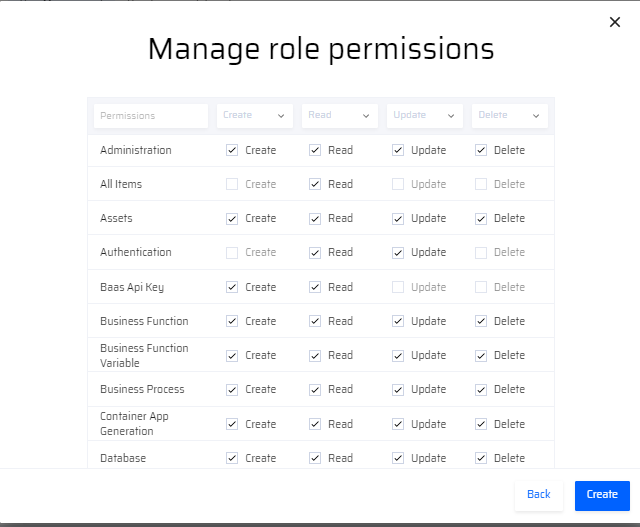
- Permissions - The role permissions are displayed in a popup window. It can be edited by selecting the required permissions. Click Update to save the changes.
Adding a New Role
To add a new role, the admin can do the following:
1. Click New Role.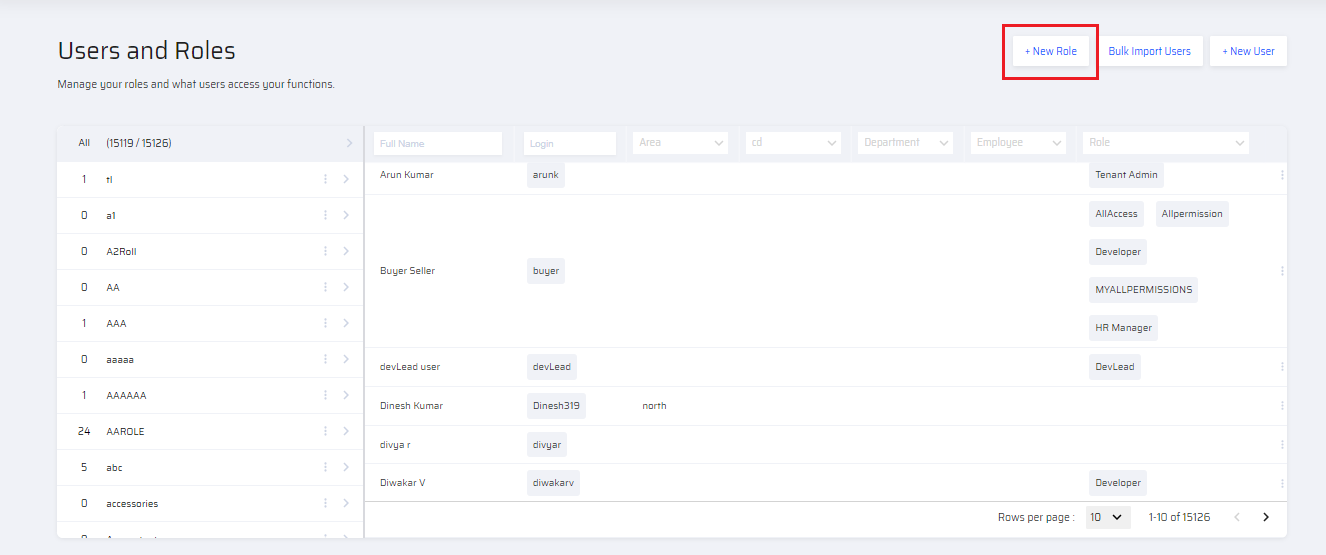
2. A popup window opens. Enter the Role Name and Role Description. A checkbox is provided to decide whether the new role created is a developer or an admin.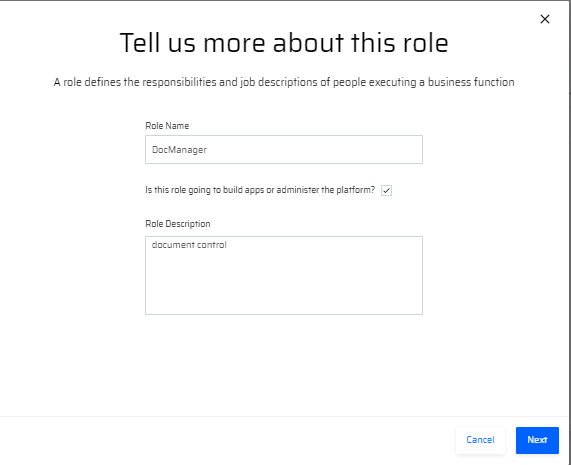
Unlike the default roles, this new role, however, can be edited/deleted based on the admin preferences and requirements.
3. Click Next to set Role Rules in the next page. 4. Click Next again to set Role Permissions in the next page.
5. Click Create to save the new role.
Users
The Users section is present adjacent to the list of roles. Clicking any of the roles on the left displays a list of users pertaining to the particular role.
In the EdgeReady Cloud, the admin can do the following tasks:
- Create a New user
- Edit an existing user
- Assign a user to a role
- Unassign a user from a role
- Deactivate a user
- Bulk import users.
Create a New User
To create a new user:
1. Select a specific role, and click the +New button on the far right of the screen.
2. A Create user popup window opens. The details requested for creating a new user are shown below:
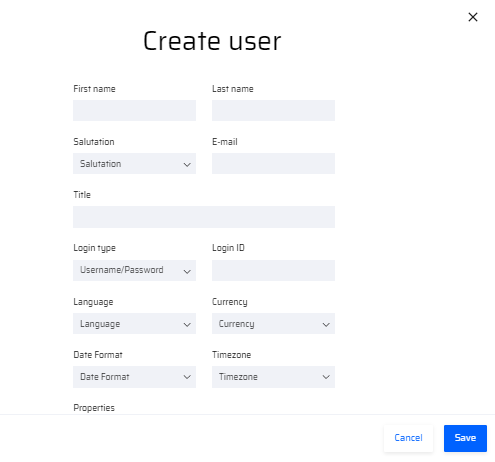 | 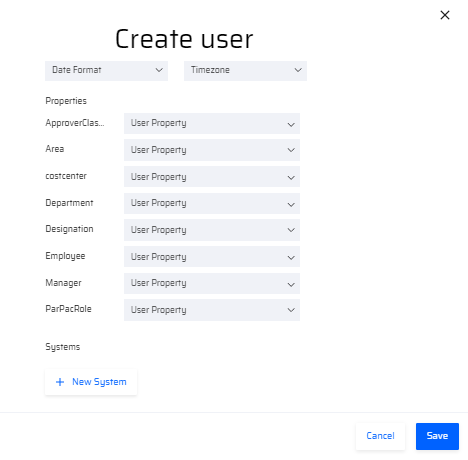 |
3. Then click +New System button. This refers to the Plugin for a respective user. 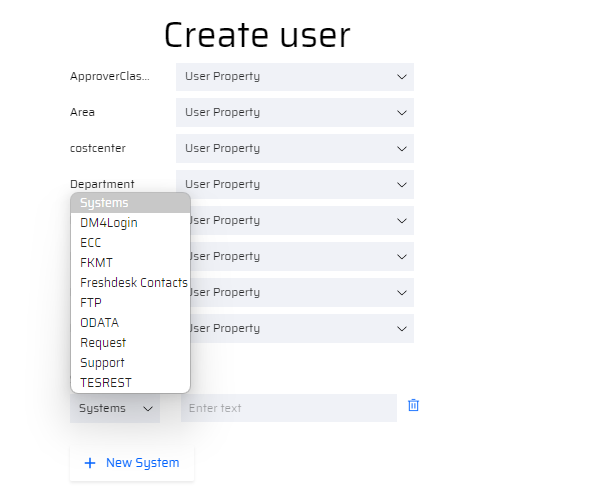
A plugin is selected from the dropdown list and a description is provided in the text area.
4. Click Save. Now a user is added to the selected role.
New systems can be added and removed for a user as required. Once a new user is added, it is displayed in the Users section.
Edit a User
To edit user information, click on the desired user. The Edit user popup window opens for editing..png)
There are three additional options provided in the popup window:
Reset Password: This is specifically provided incase a user forgets a password and requires a temporary password to login.
When the tenant admin resets the password, an email is sent to the user with a temporary password.
Unlock User: When a user exceeds the number of incorrect password entries, the account automatically gets locked.
In such circumstances, the administrator can aid the user to reset their password and unlock the account.
Delete User: Deletes the user permanently from the platform.
Assign a User to a Role
To assign a user, do the following:
- From the roles list on the left, select 'All' roles.
.png)
- Click the ellipsis menu for any user and select Assign to role. A pop up window appears.
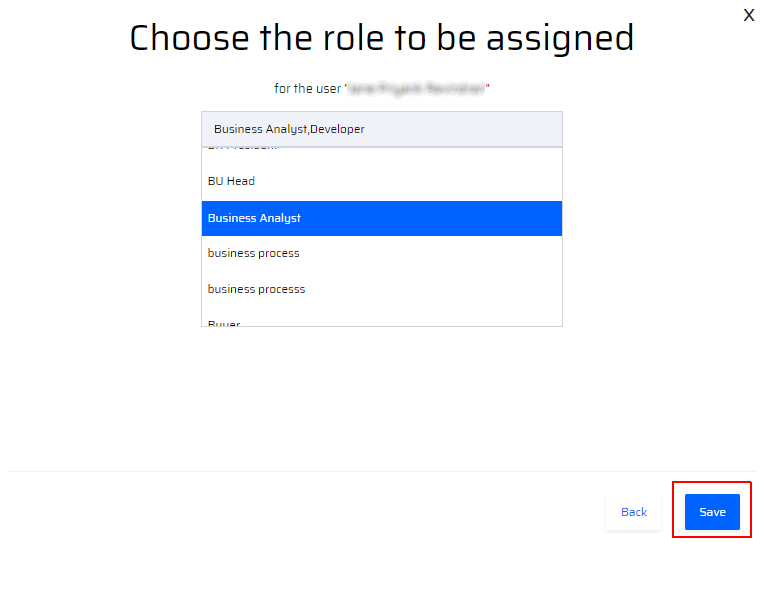
- Choose the role and click Save to update the role.
Now the user is assigned to the selected role.
Un-Assign a User from a Role
To unassign a user:
- Select the user and click the ellipsis menu. Click Assign to Role.
- In the popup window, un-select the user roles that are not required and click Save.
The unselected user roles are removed for the user.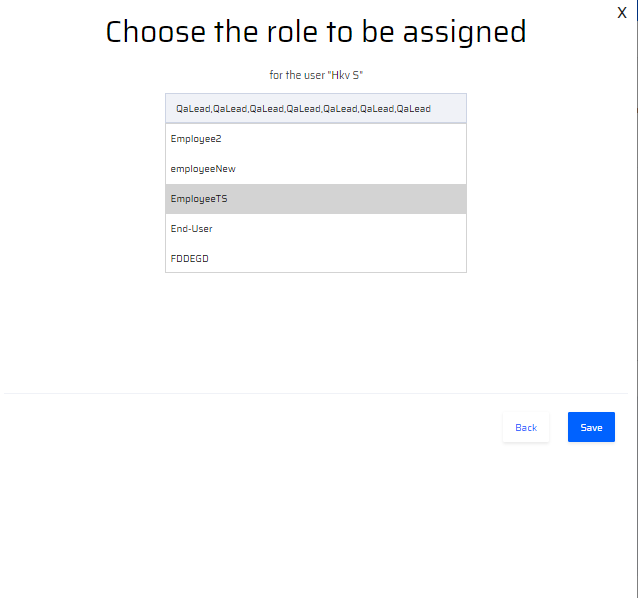
Deactivate a User
To make a user inactive, do the following:
- Click on a user. The Edit User window opens.
- Deselect the Is Active checkbox and click Save.
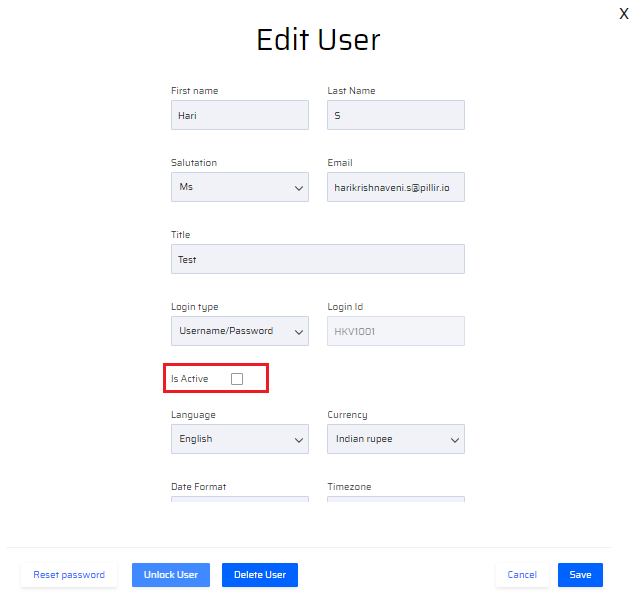
- The user is made inactive. It is indicated by user being greyed out on the screen.

- Select the "Is Active" check box to activate the user again.

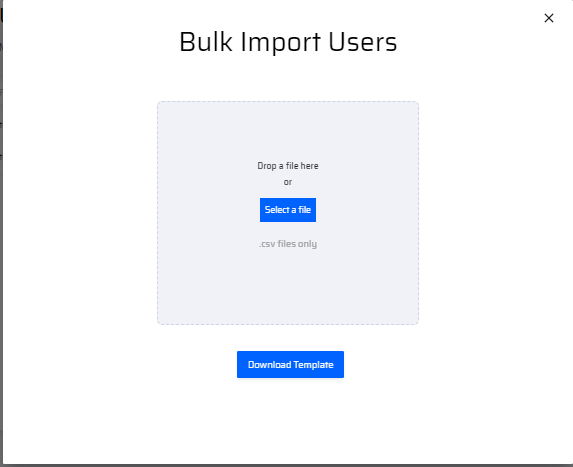
Bulk Importing Users
For the bulk import, there is an option to download a template. This can be done in csv format.
User Settings
At the bottom of the Users and Roles section, there is a User Settings panel that enables the Administrator to add a New Property to the user.
Adding a New Property refer to additional information or attributes that can be associated with a user. These attributes are defined based on the specific needs of a project. For example you can define properties such as department, employment type, account type etc. The user properties have the following features:
- User properties are typically defined as key-value pairs, where the "key" is the name or identifier of the property, and the "Value" is the data associated with that property. Storing data as key-value pairs makes them easy to use and integrate into existing SAP applications.
- A user can set a maximum of 10 user properties.
To add a new property, do the following:
- In the Users and Roles screen, scroll down to the User Settings panel and click the New Property button. The Add New Property window opens.
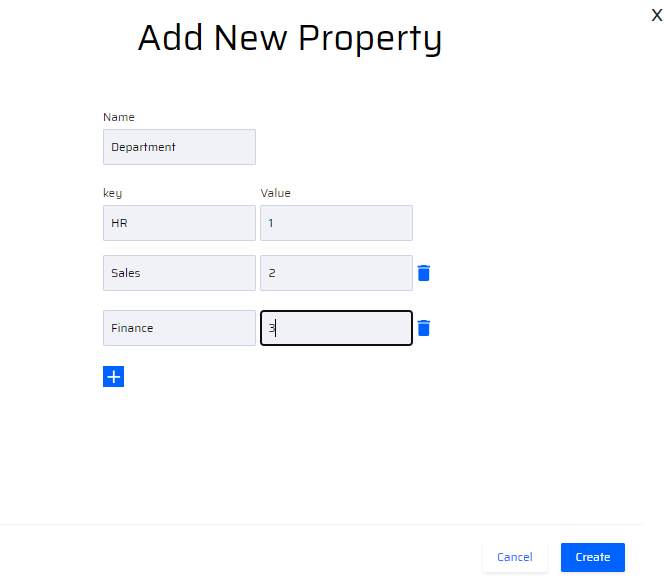
- Enter a Name for the property.
- Define the key and Value pairs as required.
- Click the
.png)

- Click Create to save the details.NoteThe key is a mandatory field, whereas Value is an optional field. Incase the Value is empty, the key becomes the Value.